wish API合作方集成指南(开放服务应用)
为了帮助 Wish API 合作方集成人员更好地理解 Wish API 文档,了解通过 API 可以执行哪些操作(相较于在 Wish 商户平台上直接操作)、哪些支持功能对构建 Wish 集成至关重要,wish平台创建了以下指南,以指导 API 合作方通过 API 创建开放服务应用。请按以下步骤操作:
1. 在 Wish 沙盒环境中注册开放服务应用:
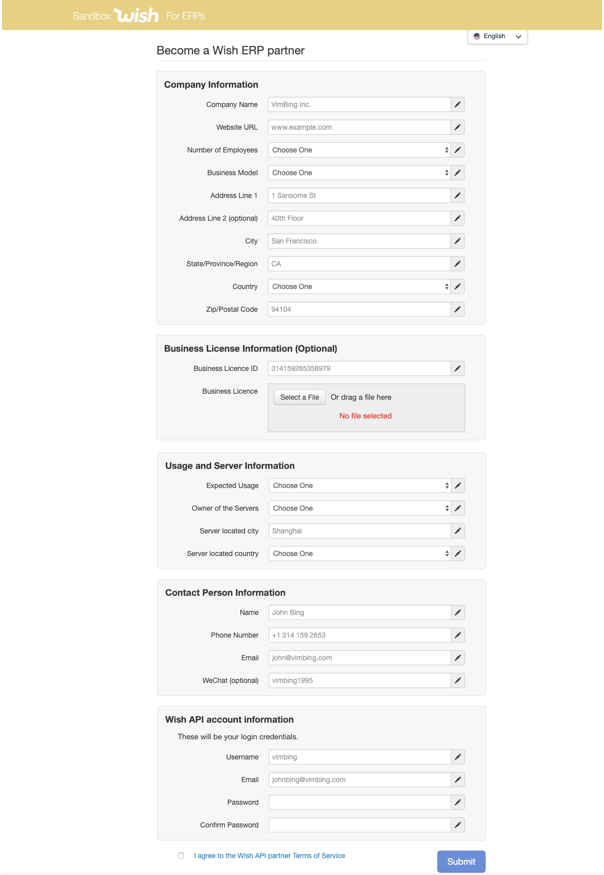
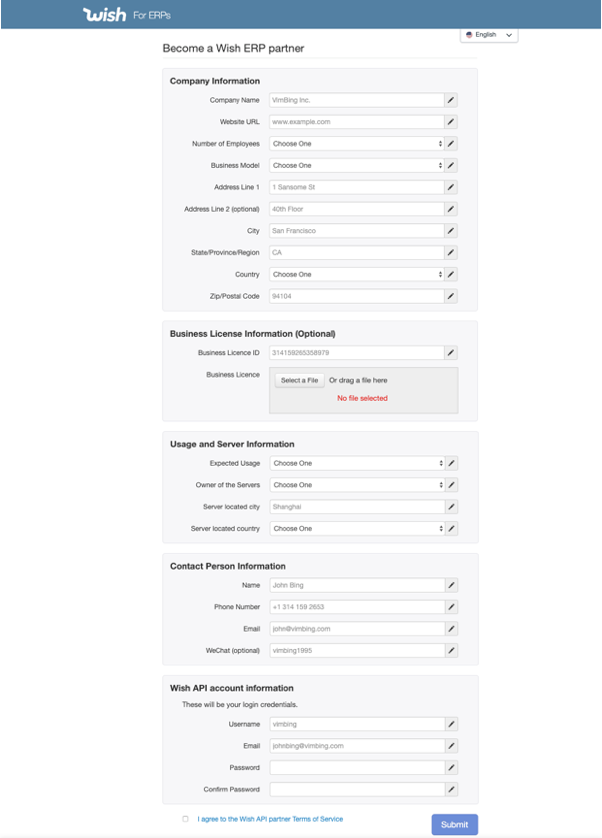
1). 合作方通过 Wish 沙盒环境中的 ERP 注册页面注册 ERP,可以参阅 Wish API 文档。
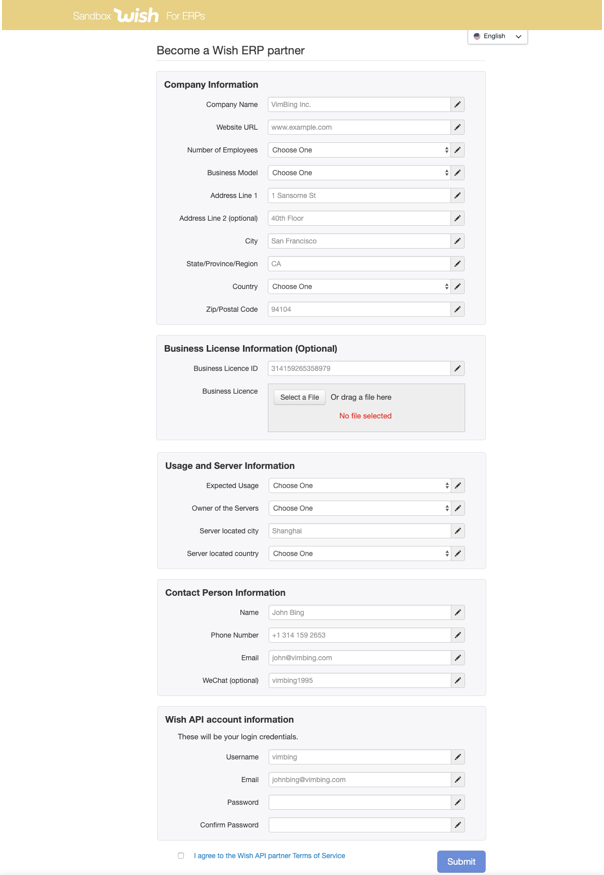
2). 合作方发送电子邮件至 Wish 合作方 API 邮箱 (partner-api@wish.com),告知 Wish 您已注册 ERP,希望通过 API 访问 Wish 沙盒环境。
3). Wish 将审批合作方的申请。
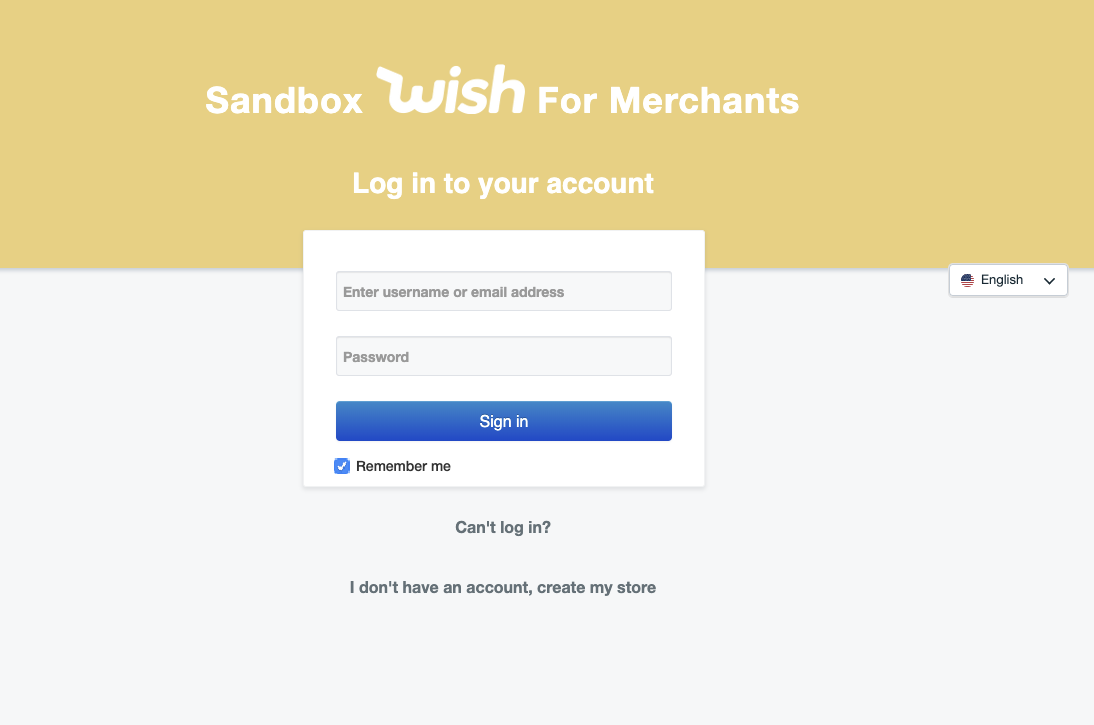
4). 申请获得批准后,合作方即可登录。

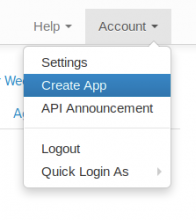
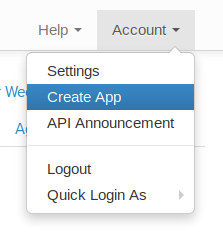
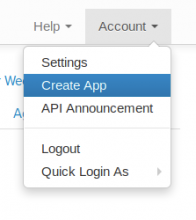
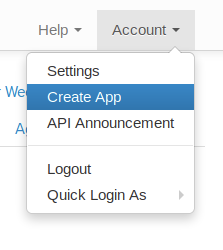
5). 点击账户 > 创建应用。
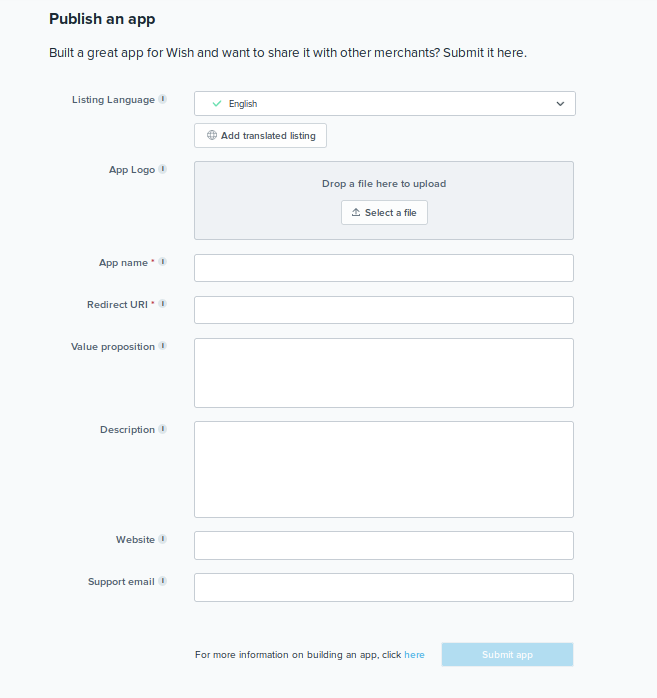
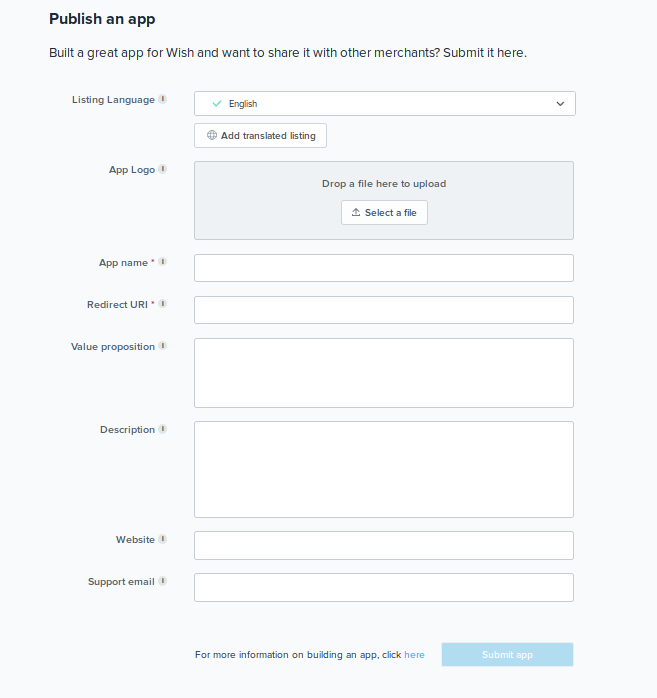
创建应用名称(使用您希望商户看到的名称)。OAuth 要求提供重定向 URL(用于接收授权,您可以随时更改此 RUL)。
请注意,商户看不到沙盒中上一页的详细信息。
6). 合作方将获得一个客户端 ID 和客户端密钥,用于在 Wish 沙盒中进行商户账户测试(在沙盒中完成 Wish API OAuth 流程需要用到该客户端 ID 和客户端密钥)。
2. 合作方可以用商户身份再次登录沙盒。由于这是沙盒环境,合作方不必输入真实的商户信息。
1). 合作方使用新的电子邮件(不同于注册 ERP 时使用的电子邮件)登录 Wish,并以商户身份开始开发开放服务应用。
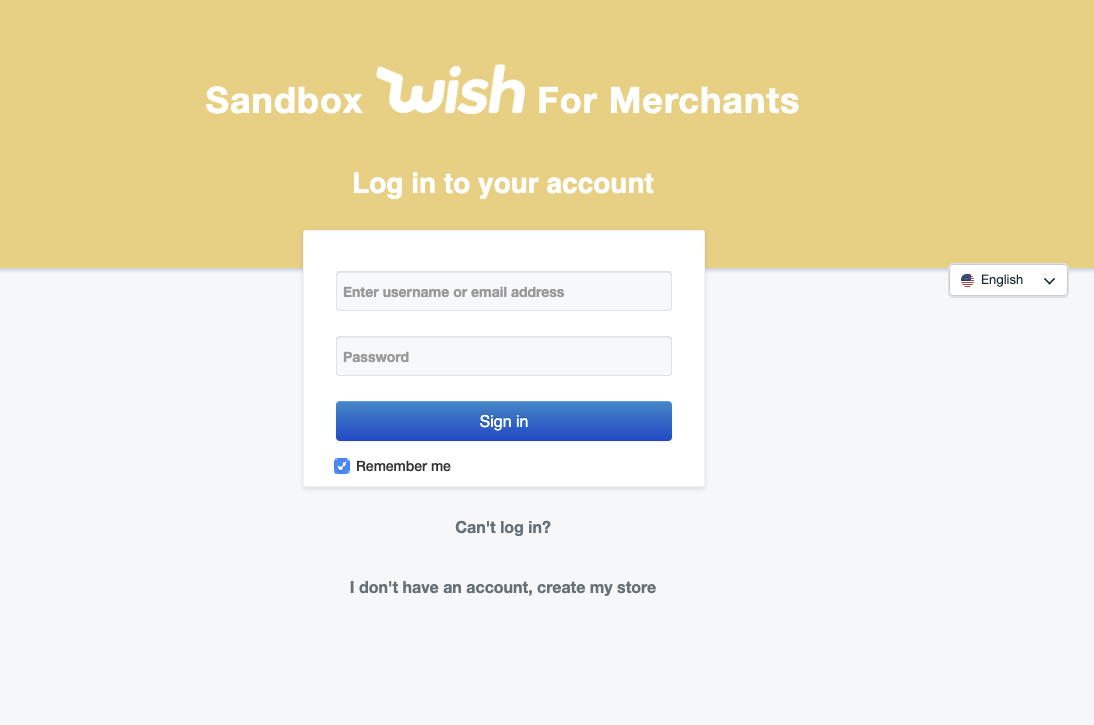
2). 将虚拟商户账号与 ERP 合作方关联。
a). 在沙盒中以商户身份登录时,商户应将 URL 更改为 https://sandbox.merchant.wish.com/v3/oauth/authorize?client_id={client_id},其中 {client_id} 是商户创建开放服务应用时由 ERP 生成的 client_id。此时系统将显示提示,要求商户授权 ERP 全权访问商户店铺。
b). 当商户授权后,URL 将更改为 https://example.redirect.uri.com?code={authorization_code},这是 ERP 创建开放服务应用时指定重定向到的位置。
c). 此时,可以按照典型的 OAuth 流程进行操作。
d). 所有 API 请求都应包含 access_token。访问令牌有效期为30天。
e). 要获得新的访问令牌,可以使用 refresh_token。此操作将使前一个令牌失效。
3). 合作方将在 Wish 沙盒环境中进行所有测试。
4). 无需请求 Wish 额外批准即可继续。
3. 在 Wish 生产环境中注册开放服务应用
1). 合作方通过 Wish 生产环境中的 ERP 注册页面在生产环境中注册 ERP。
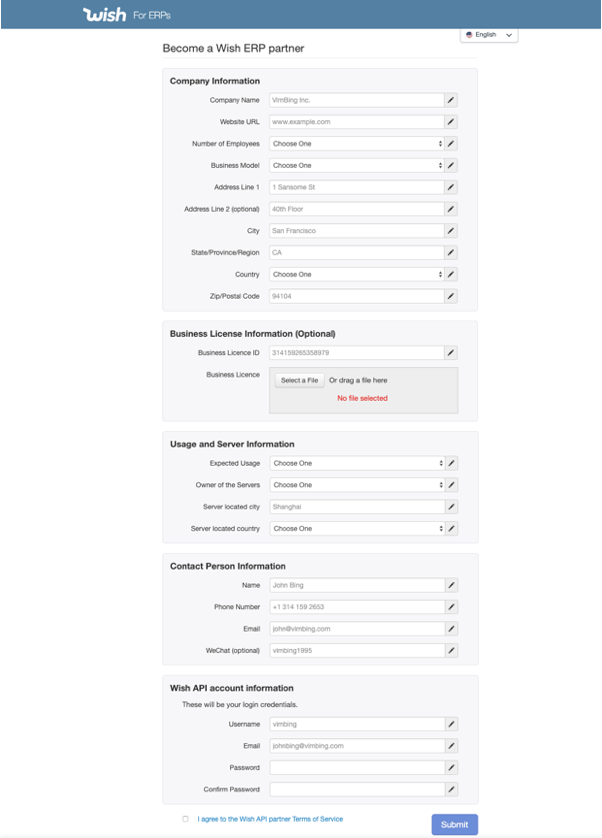
2). 合作方发送电子邮件至 Wish 合作方 API 邮箱 (partner-api@wish.com),告知 Wish 您已注册 ERP,希望通过 API 访问 Wish 生产环境。
3). Wish 将审批合作方的申请,若发现问题,则通知合作方。
4). 获得批准后,您可以登录账户并选择账户 > 创建应用。
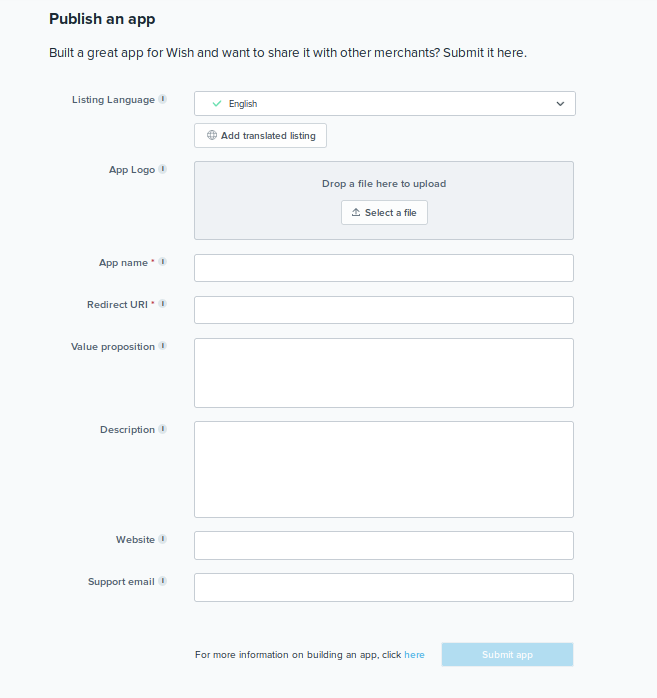
合作方输入要在 Wish 应用商店发布的信息。“应用名称”和“重定向 URL”是必填字段。合作方还可以输入附加信息,例如应用徽标、价值主张、描述、网站和/或客服邮箱,这些信息需要经过审核,因为这些信息将显示给商户。
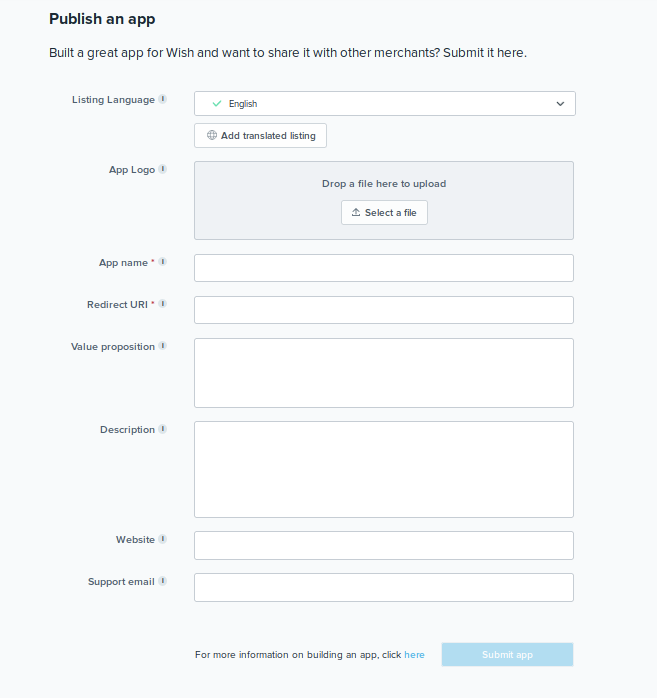
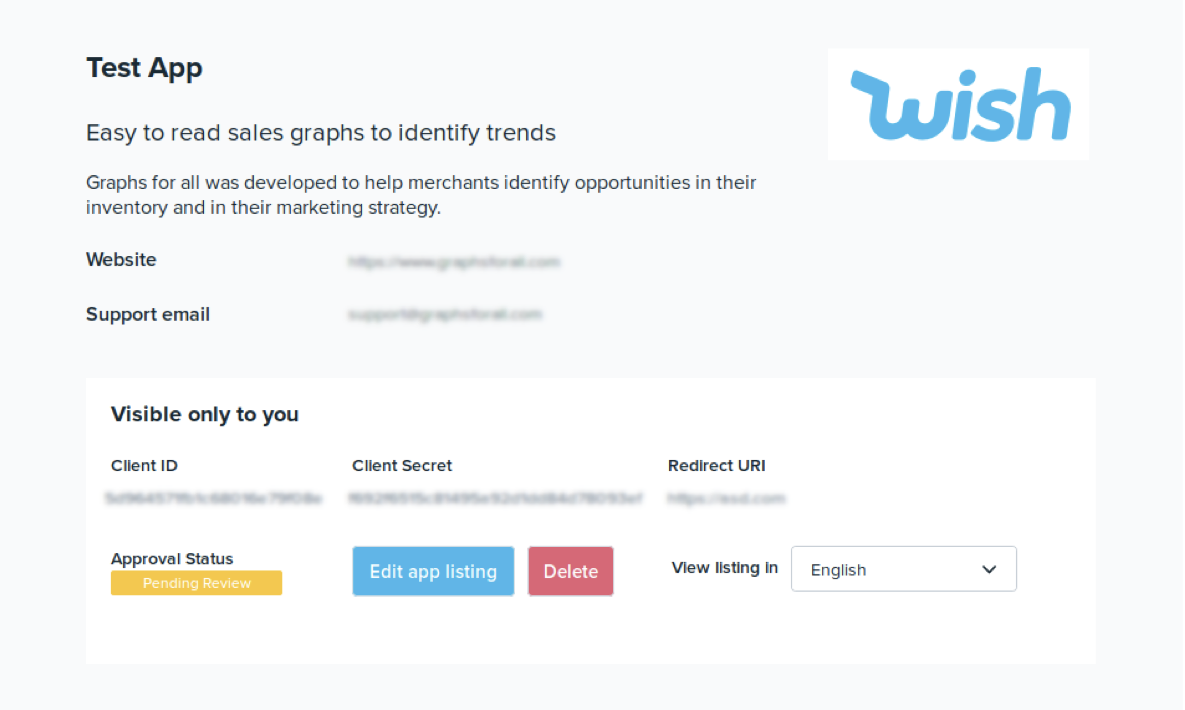
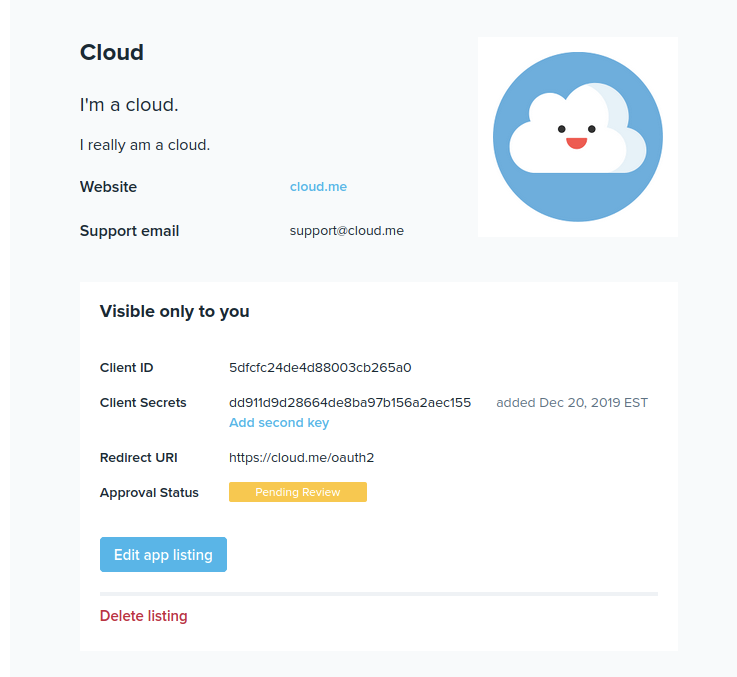
输入这些附加信息不影响开放服务应用的创建和 API 集成,但这些字段仅在获得批准后才会发布到 Wish 应用商店中。同时,可以按如下所示查看这些附加信息字段的批准状态。
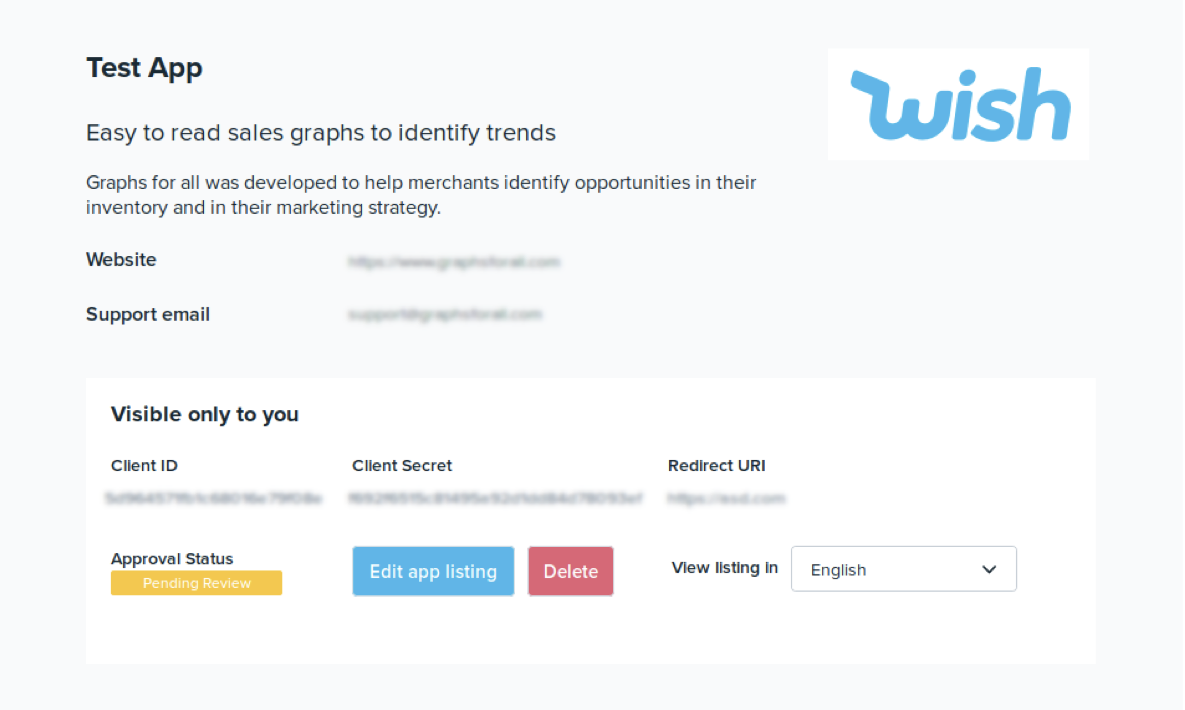
您可以前往wish账户 > 应用设置,查看和编辑上面提交的所有信息(必填项或附加信息)。如果编辑或删除了附加信息字段中的信息,将需要重新进行审核。
5). 参阅 Wish 生产环境 API 文档。
6). 合作方完成 OAuth 流程。
7). 合作方需要启动 Wish 生产环境集成,并记得将 API 调用指向 Wish 生产环境,而不是沙盒环境。
4. 商户必须在 Wish 商户平台上注册一个唯一的店铺账户,并授权 ERP 向商户的 Wish 店铺发送数据并从其店铺接收数据。
1). 注册商户账户时,商户需要提交验证营业执照和个人信息 ID 的信息,这些信息将由 Wish 进行审批。
2). 商户账户将由 Wish 客户经理代表进行审批。
3). 然后商户需要通过以下方式之一授权 ERP:
a). 商户选择一个 ERP 并注册账户。
(i) 如果商户在 ERP 界面上选择 Wish 授权链接,则重定向到“OAuth 授权”页面,在这里可以授权 ERP。
• 链接应如下所示,其中包含 ERP 的唯一生产客户端 ID:https://merchant.wish.com/v3/oauth/authorize?client_id={PRODUCTION_CLIENT_ID}
(ii) 如果商户点击“授权”,则重定向到 ERP 指定的“重定向 URI”,并提供一个授权码。ERP 将使用该授权码调用 Wish API 来获得访问令牌。
b). 商户在 Wish 应用商店中搜索 ERP(注意:此过程尚未启动,但是 ERP 应该能够处理此过程,为将来的启动做好准备):
(i) 如果商户选择“添加应用”,则重定向到“OAuth 授权”页面,商户可以在该页面授权 ERP。
(ii) 如果商户点击“授权”,则重定向到 ERP 指定的“重定向 URI”,并提供一个授权码。ERP 将使用此授权码调用 Wish API 来获得访问令牌。
• 如果 ERP 指定的“重定向 URI”页面无法处理商户未登录和/或没有 ERP 账户的情况,则说明连接可能未完成。
• 要完成连接,请提示商户登录或注册 ERP。然后将授权码添加到 URL 中,并在商户登录或创建账户后完成 OAuth 流程。
c). 至此即完成授权过程。
d). 如果商户想要取消 ERP 授权,可以随时通过 Wish 商户平台上的“账户”>“设置”>“API 设置”取消授权。
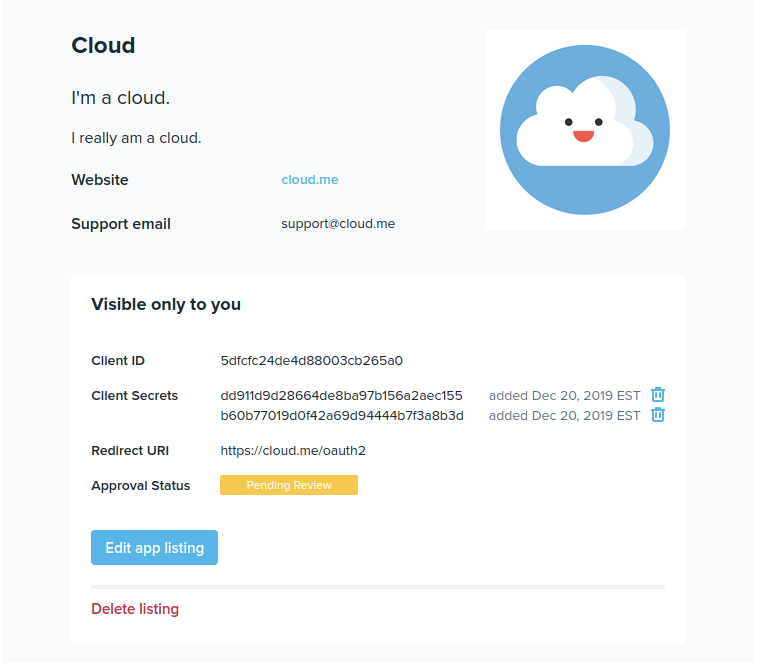
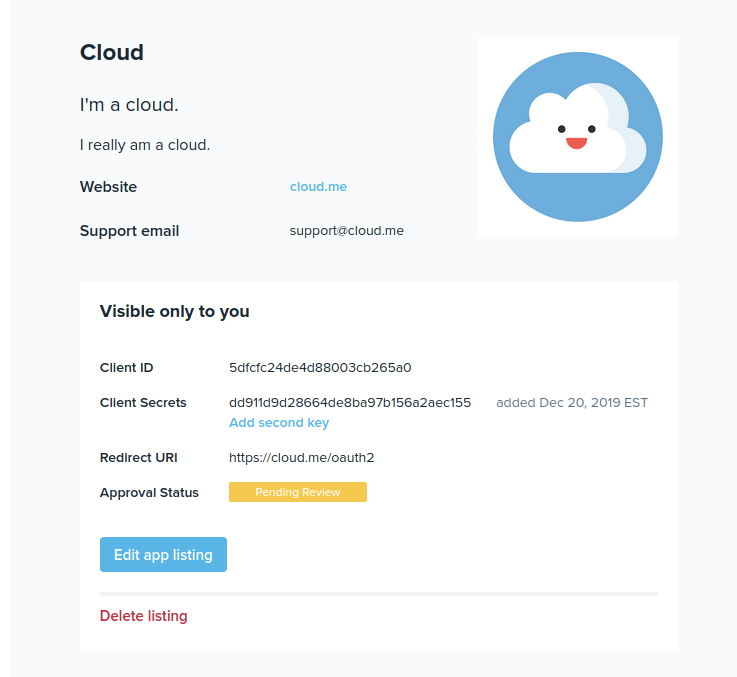
请注意,为了提高开放服用应用的安全性,合作方现在最多可为开放服务应用添加2个 OAuth 客户端密钥。只需前往“应用设置”页面,然后点击第一个客户端密钥下面的“添加第二个密钥”即可添加第二个:
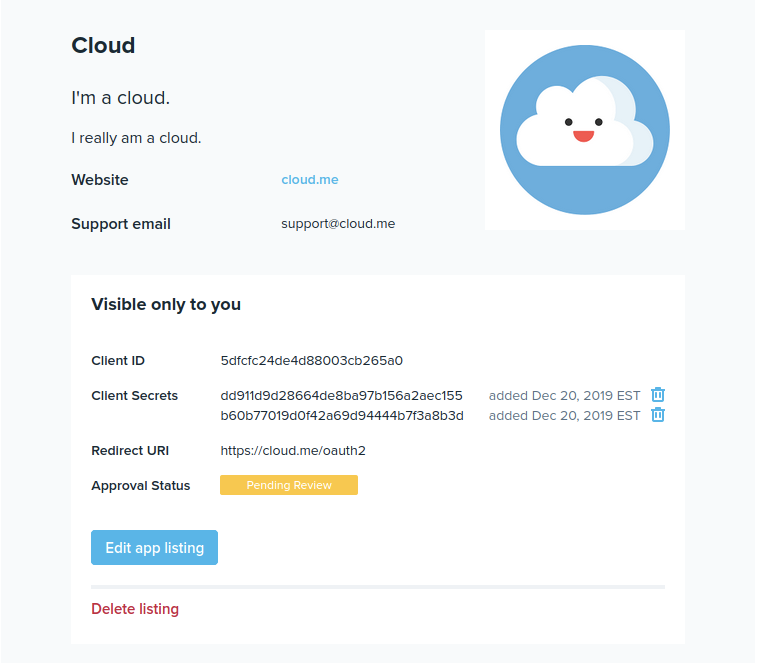
如果客户端密钥已经泄露,合作方还可以根据需要通过删除旧密钥并添加新密钥来更改2个客户端密钥。
注意:要查找文档、提示、教程等链接,请前往 Wish 开发人员页面。
wish商户官网原文详情:
Guide for API Partner Integrations (Public App)
To help Wish API partner integrators better understand the Wish API documentation, what actions can be done via API compared to on Merchant Dashboard, and what features are critical to support when building integration to Wish, we've created the following guide to walk API partners through how to get started on creating a public app via API. Please follow each step:
1. Sign up for public app on Wish sandbox environment:
1). Partner registers as ERP via the ERP Signup page on Wish sandbox environment. Partner can review Wish API documentation.
2). Partner emails Wish Partner API email (partner-api@wish.com) to let Wish know they have signed up for Partner API access to the Wish sandbox environment.
3). Wish will approve Partner’s application.
4). Once Partner is approved, Partner should sign in.
5). Click on Account > Create App.
Create an app Name (use a name that you want merchants to see). Redirect URL is needed for OAuth (it’s where authorization is sent to, you can alter it at any time).
Please note, the details on the above page in Sandbox will not be seen by merchants.
6). Partner will be provided with a client ID and client secret, which will be used by the Partner to do merchant account testing on Wish sandbox (Wish API OAuth process on sandbox requires client ID and client secret).
2. Partner to make a second login on Sandbox as a merchant. Since this is the sandbox environment, the merchant information input by Partner does not need to be that of an actual merchant.
1). Partner will use a different email from ERP registration to sign into Wish and begin public app development as a merchant.
2). Associate the fake merchant account with the ERP Partner.
a). When logged in as a merchant in the sandbox the merchant should change the URL to https://sandbox.merchant.wish.com/v3/oauth/authorize?client_id={client_id} where {client_id} is the client_id that the ERP generated when they created the public app. This will trigger a prompt asking for the merchant to authorize the ERP to have full access to the merchant store.
b). When the merchant authorizes permission the URL will change to https://example.redirect.uri.com?code={authorization_code} where the redirect was specified when the ERP created the Public App.
c). At this point the typical oAuth processes can be followed
d). All API requests should include the access_token. Access tokens are valid for 30 days.
e). To obtain new access tokens the refresh_token can be used. This action will invalidate the previous token.
3). Partner will do all testing in Wish sandbox environment.
4). No additional approval from Wish is required to proceed
3. Sign up for public app on Wish production environment
1). Partner registers as ERP in production via the ERP Signup page on Wish production environment.
2). Partner emails Wish Partner API email (partner-api@wish.com) to let Wish know they have signed up for Partner API access to the Wish production environment.
3). Wish will approve Partner’s application or notify Partner of identified issues.
4). Once approved, you may login and select Account > Create App.
Partner enters information to be published in the Wish App Store. App name and Redirect URL are required fields. Partner may also enter additional information, such as app logo, value proposition, description, website and/or support email, which need to undergo a review process as they will be visible to merchants.
If this additional information is entered, the app will still be created and be able to integrate with the API, however, these fields will only be published in the Wish App Store once they are approved. In the meantime, the approval status of these additional information fields can be viewed as shown below.
You can view and edit all information submitted above (required or additional) by navigating to Account > App Settings. If the details in the additional information fields are edited or deleted, they will need to undergo the review process again.
5). Review Wish Production environment API documentation
6). Partner completes OAuth process.
7). Partners need to turn on their integration in Wish production environment and remember to point API calls to Wish production environment instead of sandbox environment.
4. Merchants must register a unique store account on Wish Merchant Dashboard and authorize the ERP to send/receive data to/from the merchant’s Wish store.
1). As part of merchant account registration, merchants will need to submit information verifying business license and personal information ID, which will be approved by Wish.
2). Merchant accounts will be approved by a Wish account manager representative.
3). Merchants then need to authorize ERP through one of the following methods:
a). Merchant registers for an account at the ERP of their choice.
(i) Merchant selects Wish authorization link from ERP interface to redirect them to an OAuth Authorization page where they can authorize the ERP.
• The link should be as follows with the ERPs unique production client ID: https://merchant.wish.com/v3/oauth/authorize?client_id={PRODUCTION_CLIENT_ID}
(ii) Merchant clicks ‘Authorize’ to redirect them to the ERP specified "Redirect URI" with an authorization code. ERP will use this authorization code to call Wish APIs to get access token.
b). Merchant discovers ERP on the Wish App Store (NOTE: this process is not yet launched, but ERPs should be able to handle this process in preparation for its future launch):
(i) Merchant selects ‘Add App’ to redirect them to an OAuth Authorization page where they can authorize the ERP.
(ii) Merchant clicks ‘Authorize’ to redirect them to the ERP specified "Redirect URI" with an authorization code. ERP will use this authorization code to call Wish APIs to get access token.
• The connection may not be complete if the ERP specified “Redirect URI” page cannot handle the case where the merchant is not signed in and/or doesn't have an account with the ERP.
• To complete the connection, prompt the merchant to log in or sign up for your ERP. Then, carry the authorization code forward in the url, and complete the OAuth process once the merchant is logged in or has created an account.
c). Authorization is now complete.
d). If at any point the merchant intends to de-authorize the ERP, the merchant can do so from Wish Merchant Dashboard at Account > Settings > API Settings.
Please note to improve security for public apps, partners are now able to add up to 2 OAuth client secrets for their public apps. Simply navigate to your App Settings page and click “Add second key” under the first client secret to add a second one:
If needed, partners may also rotate the 2 client secrets by deleting one and adding a new one, in case their client secrets have been compromised.
Note: For links to documentation, tips, tutorials, and more check out the Wish Developers Page.
内容来源:wish商户官方网站
