怎么在wish商户平台上启用退货功能?
如何将产品加入wish退货项目?
商户可以在商户平台上手动启用退货功能或通过 API 启用。
怎么在wish商户平台上启用退货功能?
在商户平台上前往“产品”>“查看所有产品”页面。
商户可以选择将产品单独或批量加入退货项目。请注意,如果商户使用批量加入选项,其具有物流信息的所有合资格产品的退货设置将被更新,包括已加入退货项目的任何产品。如果商户使用美国退货项目的批量加入选项,则只有其产品的美国退货设置会被更新;墨西哥和欧洲退货项目的逻辑与此相同。有关如何使用批量加入选项的信息,请参见下文的“将产品批量加入退货项目”。
将单个产品加入退货项目
1. 在商户平台上前往“产品”>“查看所有产品”。对于要加入退货项目的产品,点击“已加入退货项目”下方的“加入”:

2. 此时页面将跳转至“Wish 退货项目服务条款”页面。点击“同意”继续操作:
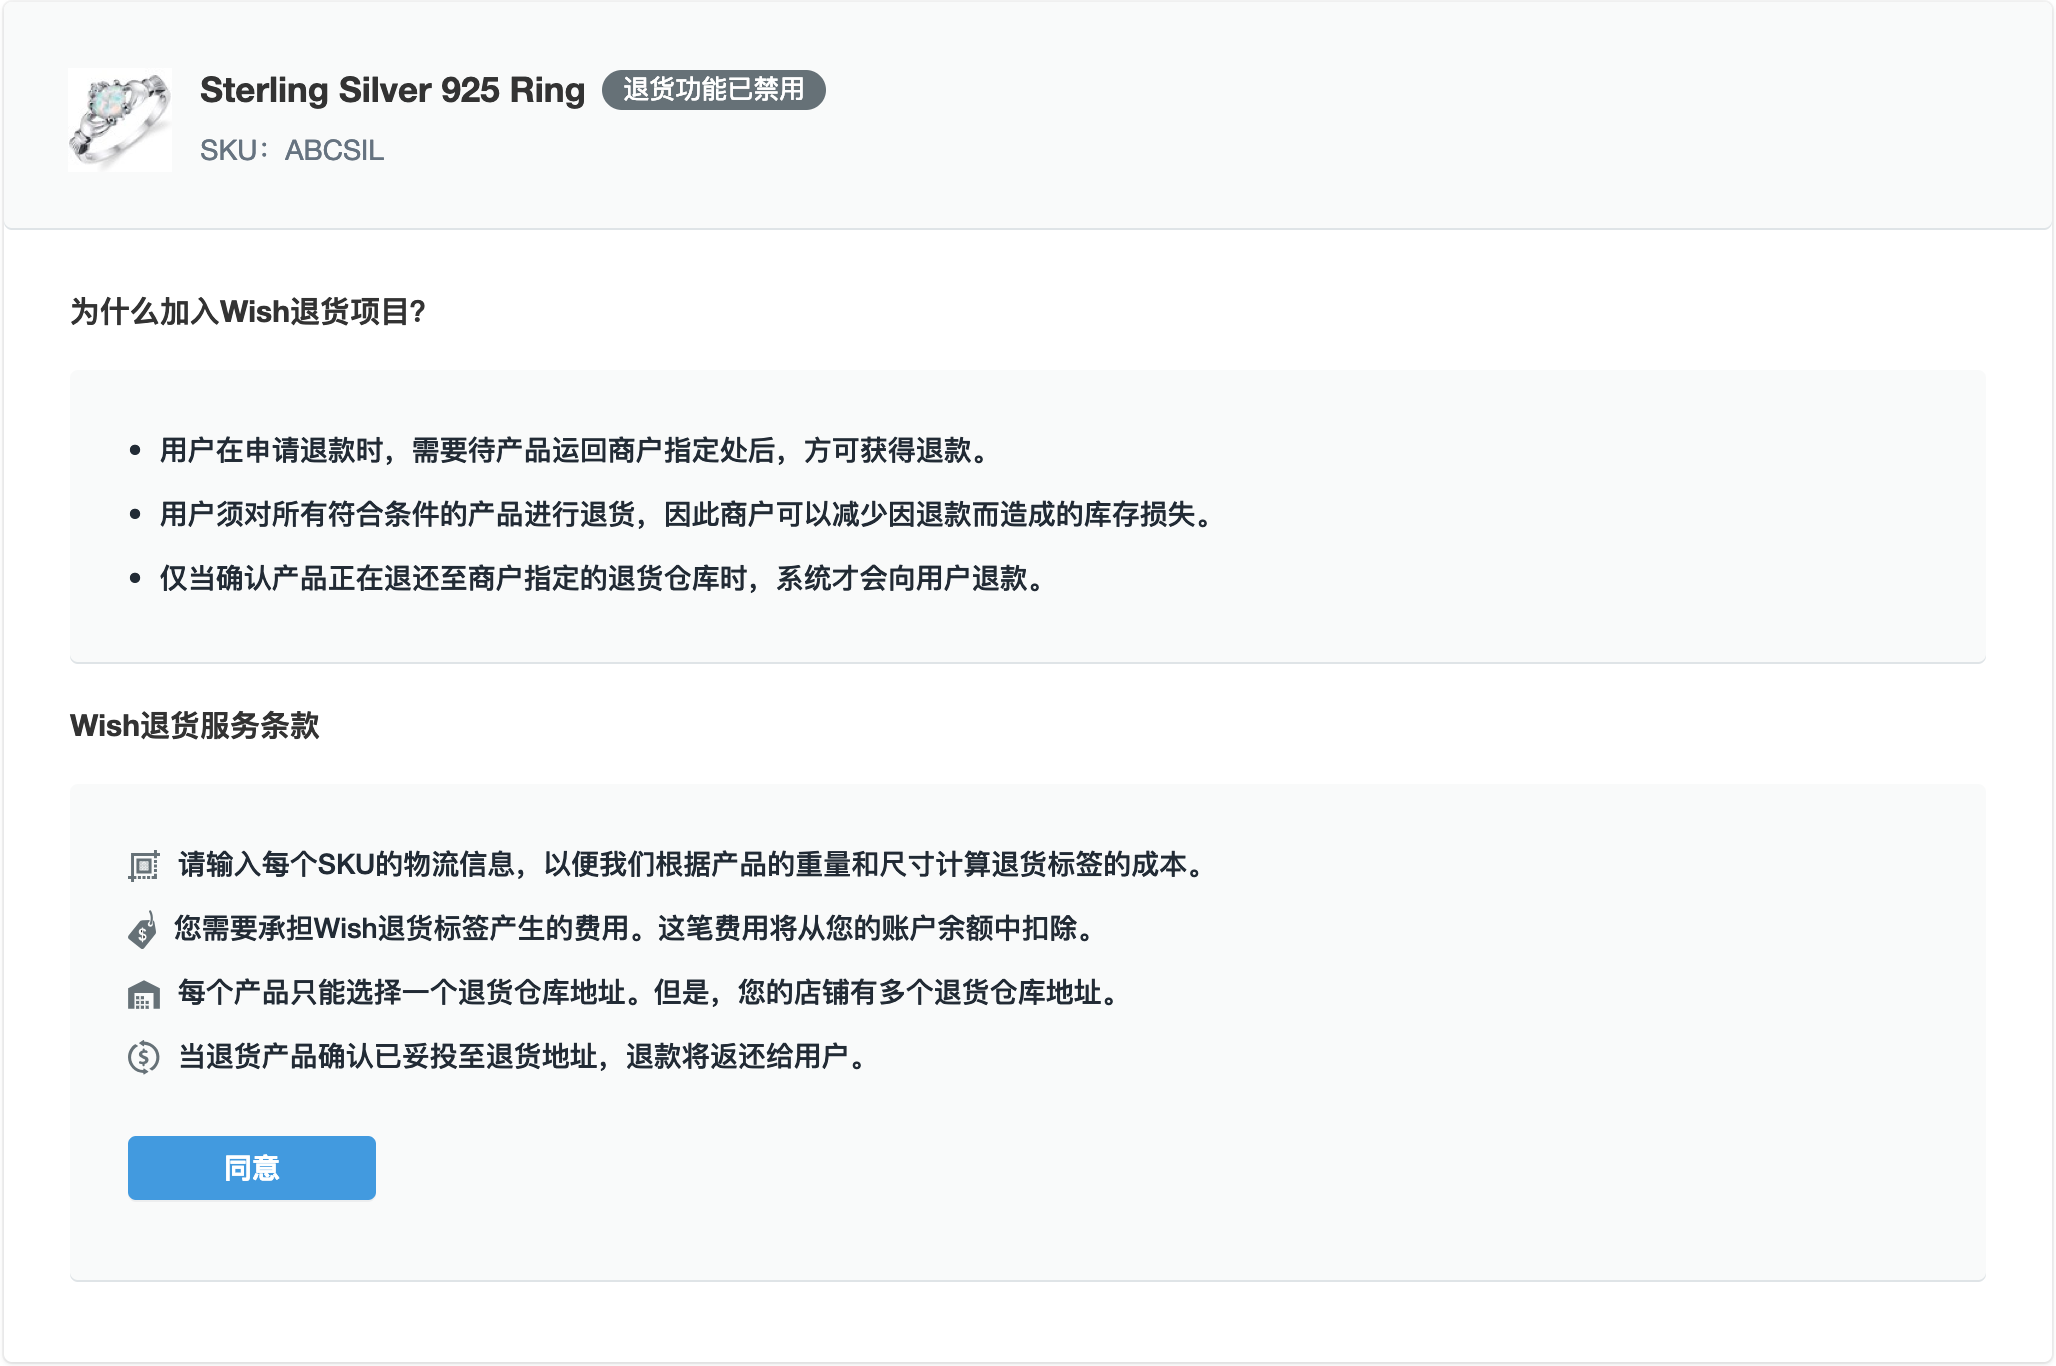
3. 如果您尚未为产品添加物流信息,系统会提示您添加。您可以通过以下方式为产品添加物流信息:手动输入、为多个产品上传 CSV 文件或使用 API 为多个产品上传物流信息。您可以查看此常见问题解答,详细了解如何为产品添加物流信息。

请注意,如果产品超出特定物流规范要求,则无法通过 Wish 退货。您将仍可以保存物流信息,但会在步骤4收到警告消息,并且无法继续将产品加入退货项目的操作。请参阅上文“参与此项目需要提供哪些信息?”部分,了解详细的物流要求。所有信息填写完毕后,请点击“保存并继续”按钮。
4. 接下来,系统将提示您输入退货仓库地址。请选择退货仓库所在地区,然后填写相关信息:
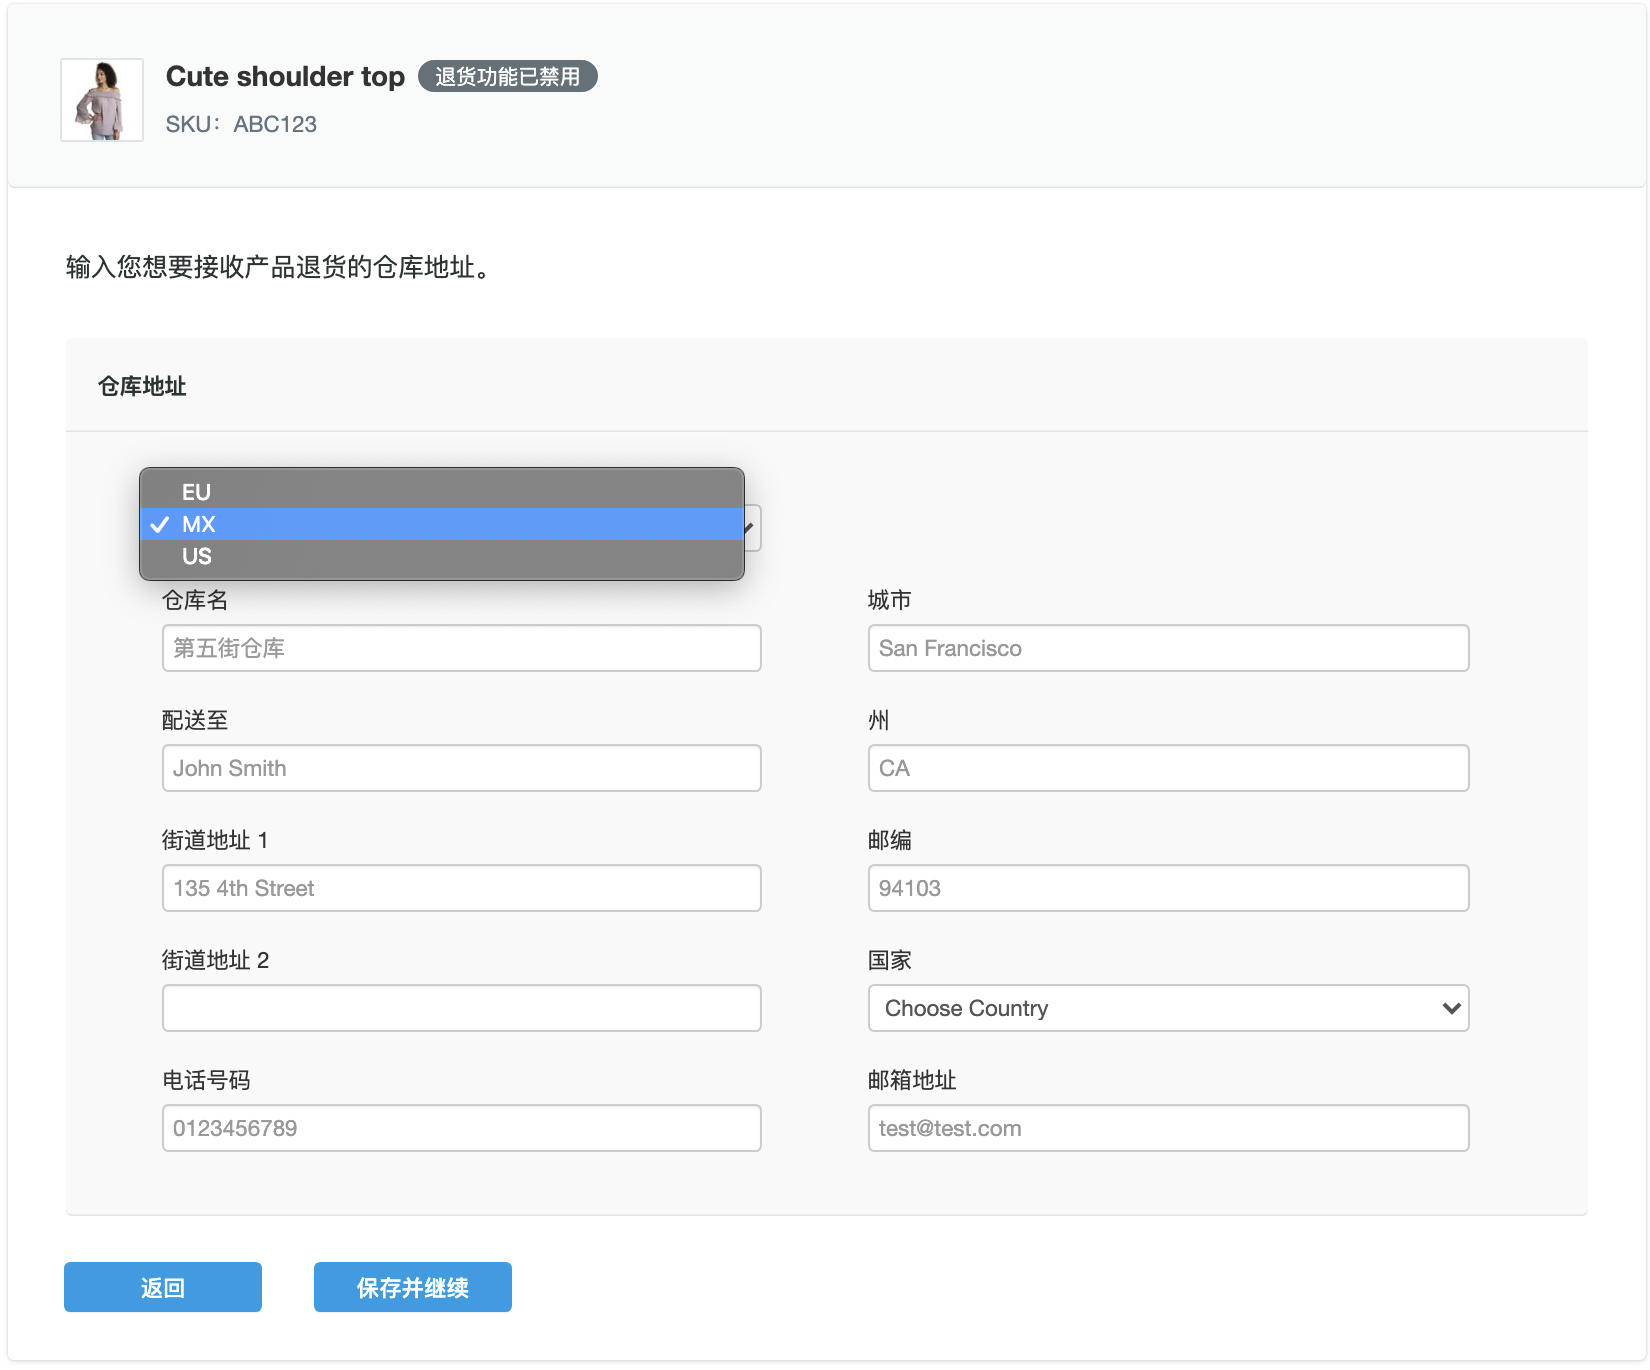
如果在步骤3中输入的物流信息超出了项目支持的相应国家/地区的规范要求,则在此页面填写退货仓库地址后,您会收到警告消息(请参见下面的欧洲退货项目截图):

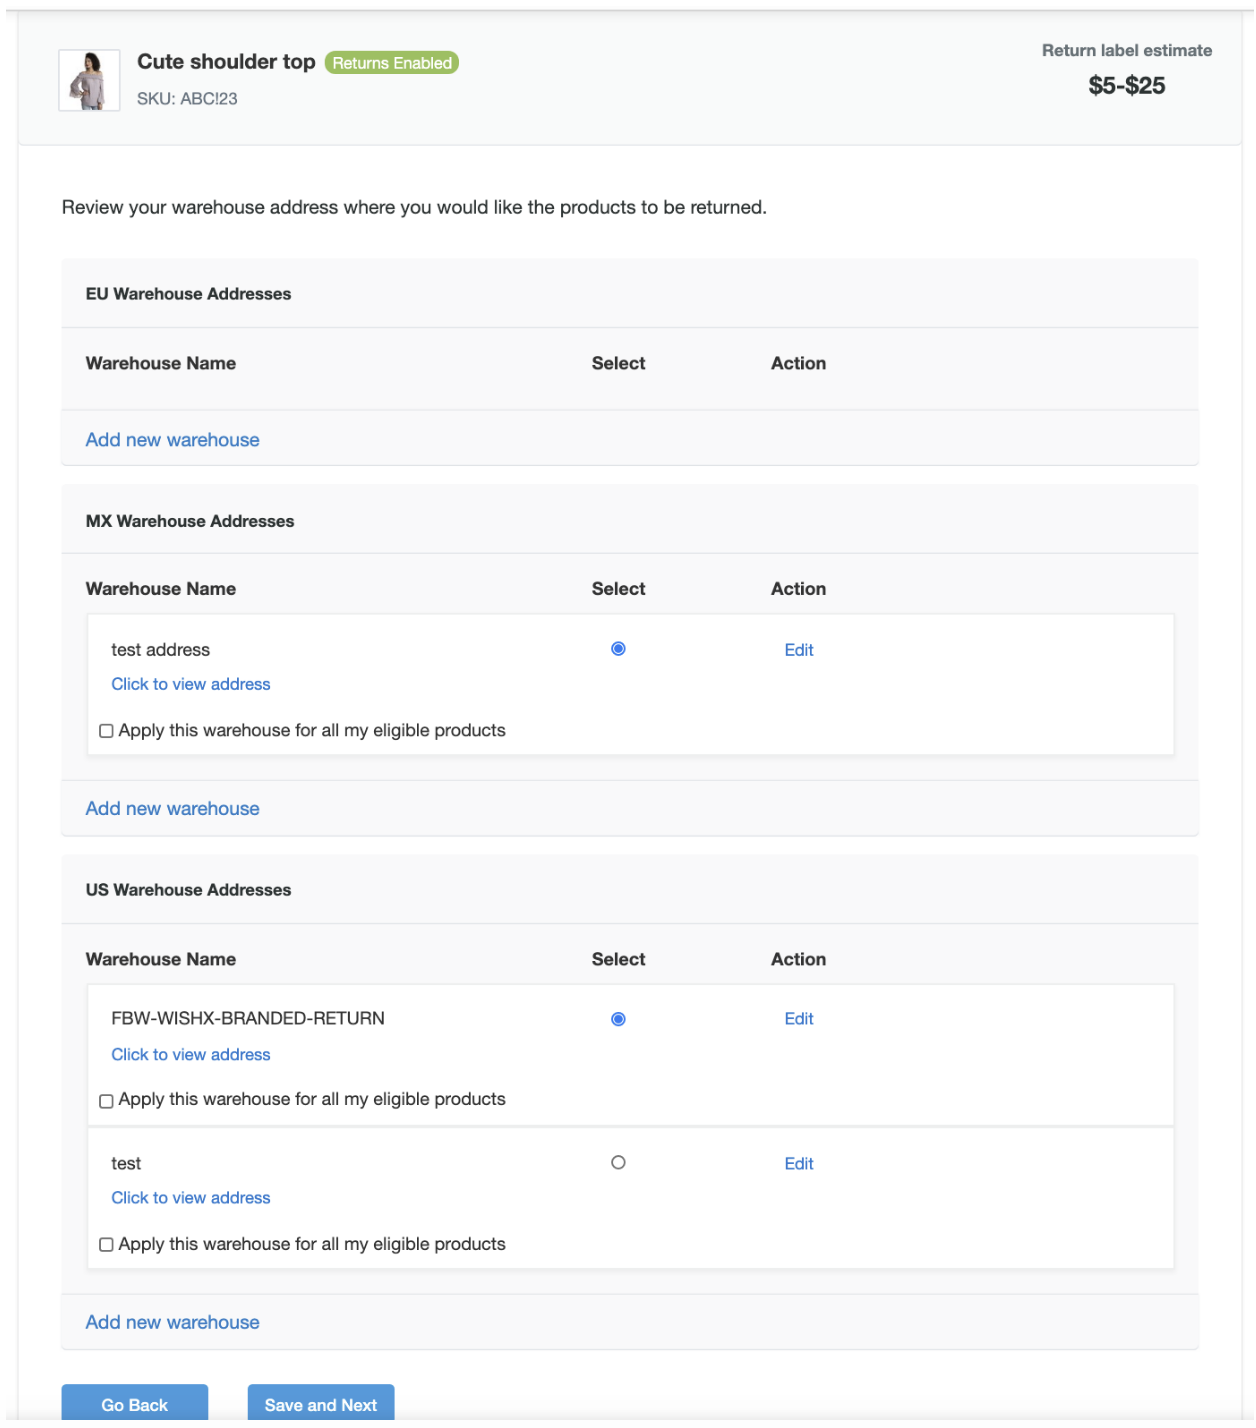
5. 正确输入退货仓库地址后,您可以查看退货仓库的地址,并为欧洲、墨西哥或美国退货项目任选其一。您可以为一个产品启用多个退货仓库,因此可以在此页面上添加新的退货仓库:

请注意,此页面提供退货标签费用估算,以便商户了解从账户余额中扣除的每笔退货的大概费用。点击“保存并继续”即可继续。
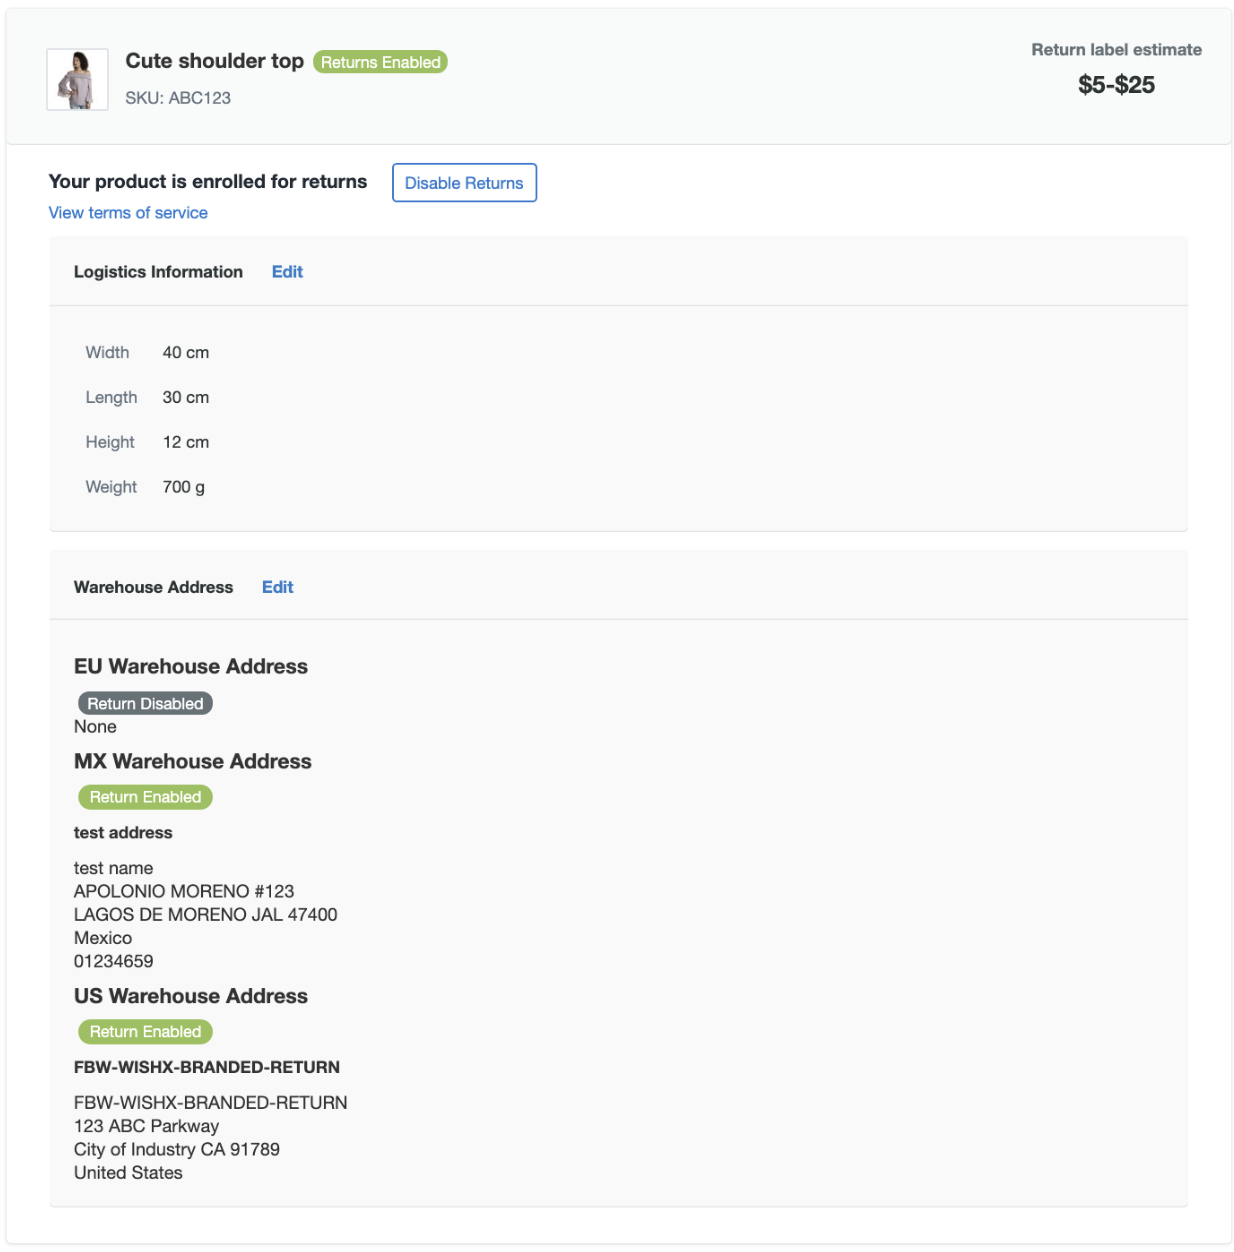
6. 此时您的产品已加入退货项目!下一页将显示产品物流信息概要、退货标签费用估算以及相应的退货仓库地址,您可以进行信息核对:
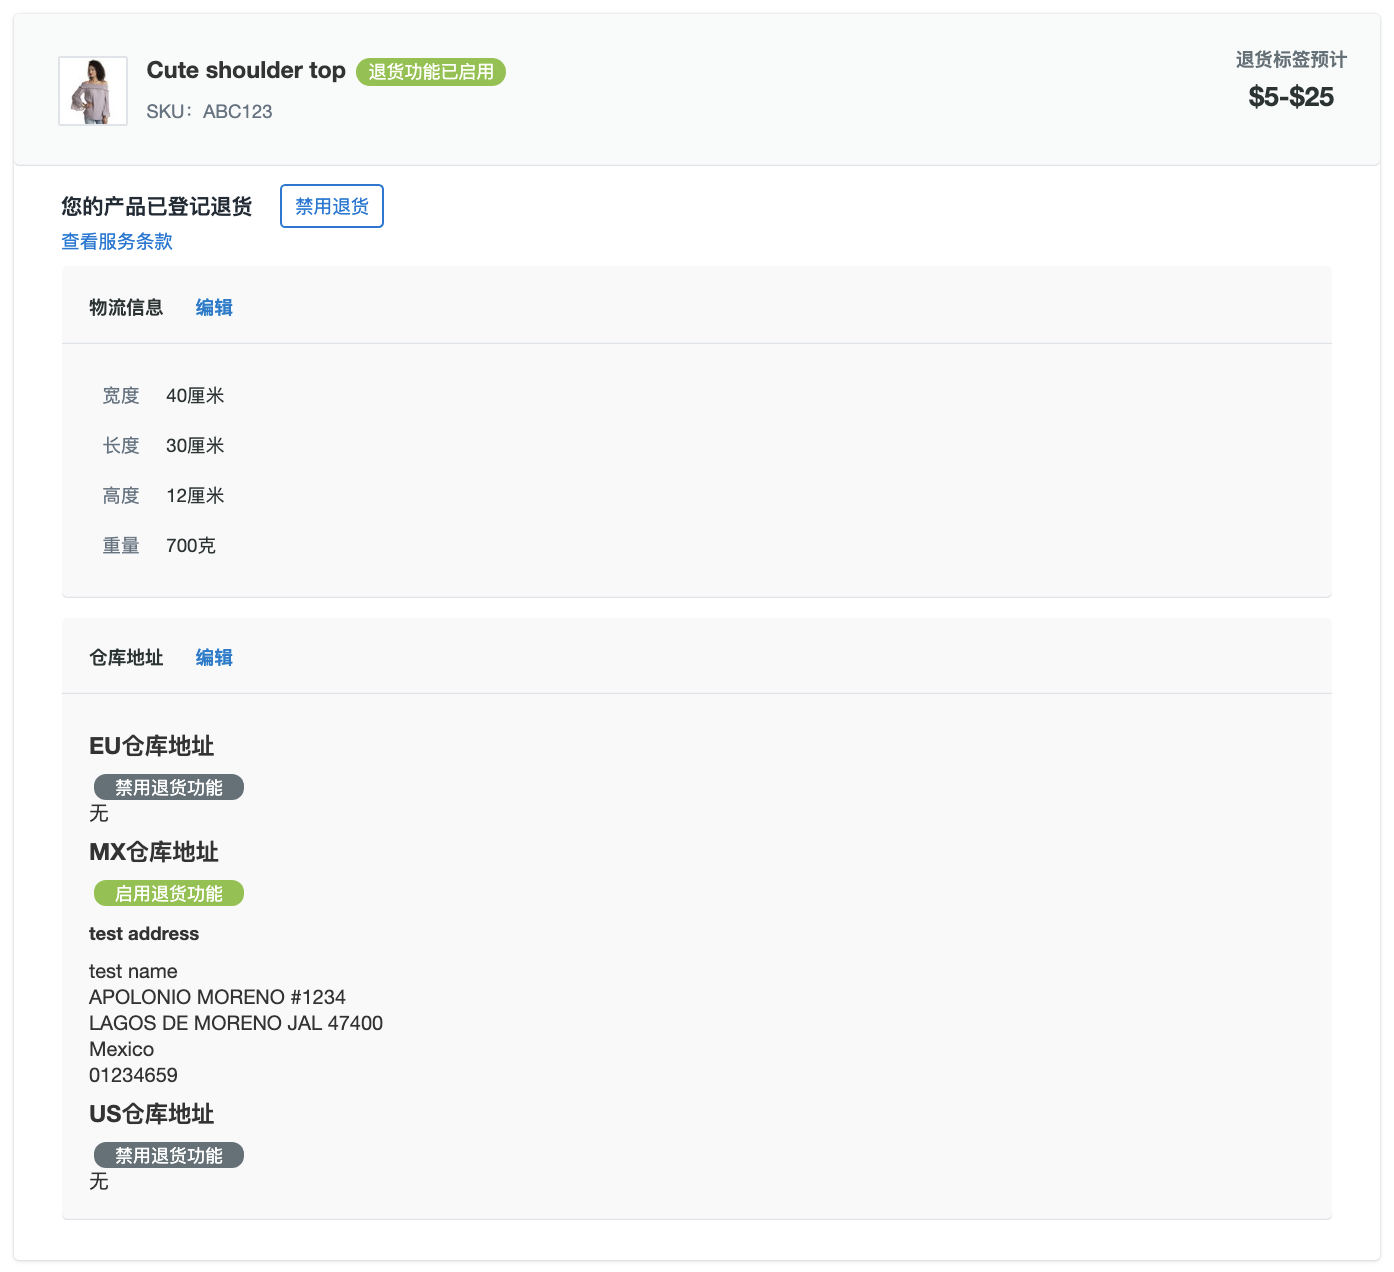
对于已加入“Wish 退货项目”的产品,您还可以前往“产品”>“查看所有产品”,点击“已加入退货项目”下的“查看”来访问其上图的概要页面:

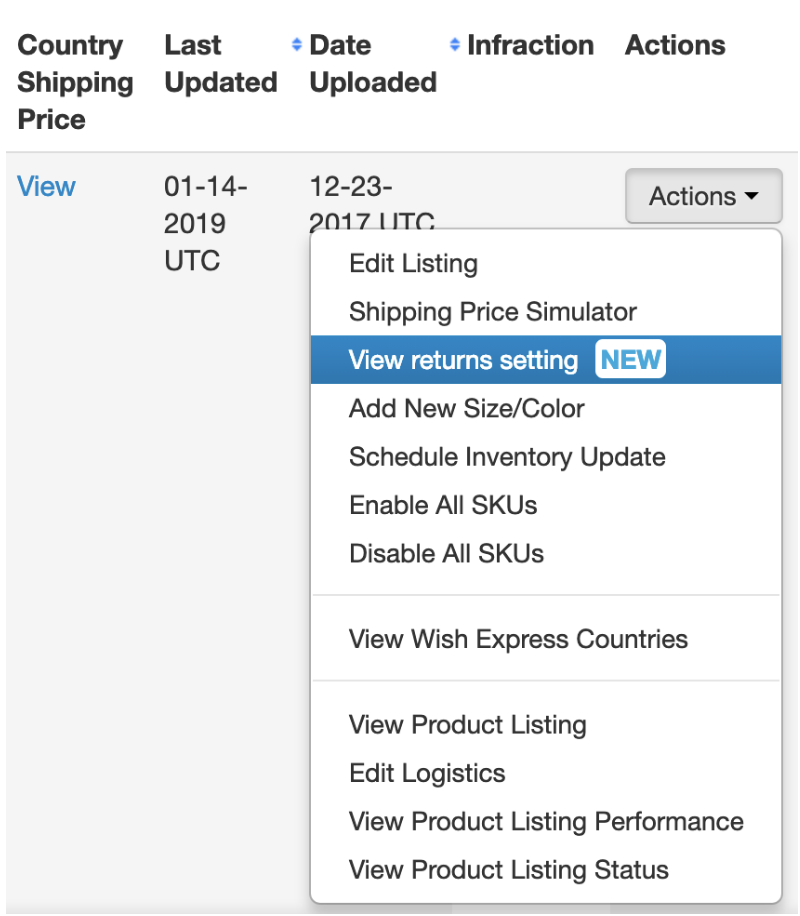
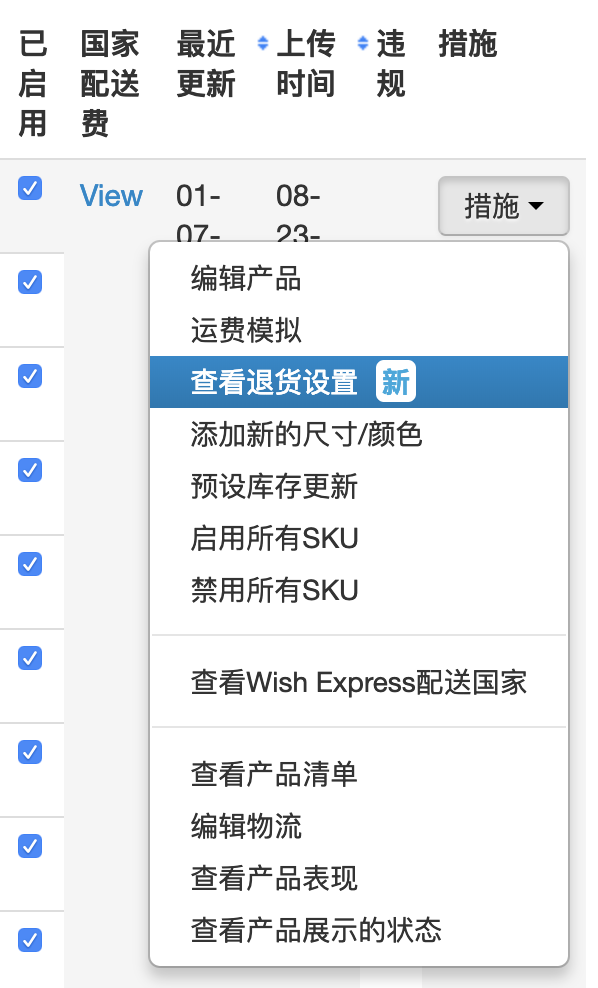
您也可以在页面右侧点击“操作”下拉菜单,然后选择“查看退货设置”来查看上述信息:
将产品批量加入退货项目
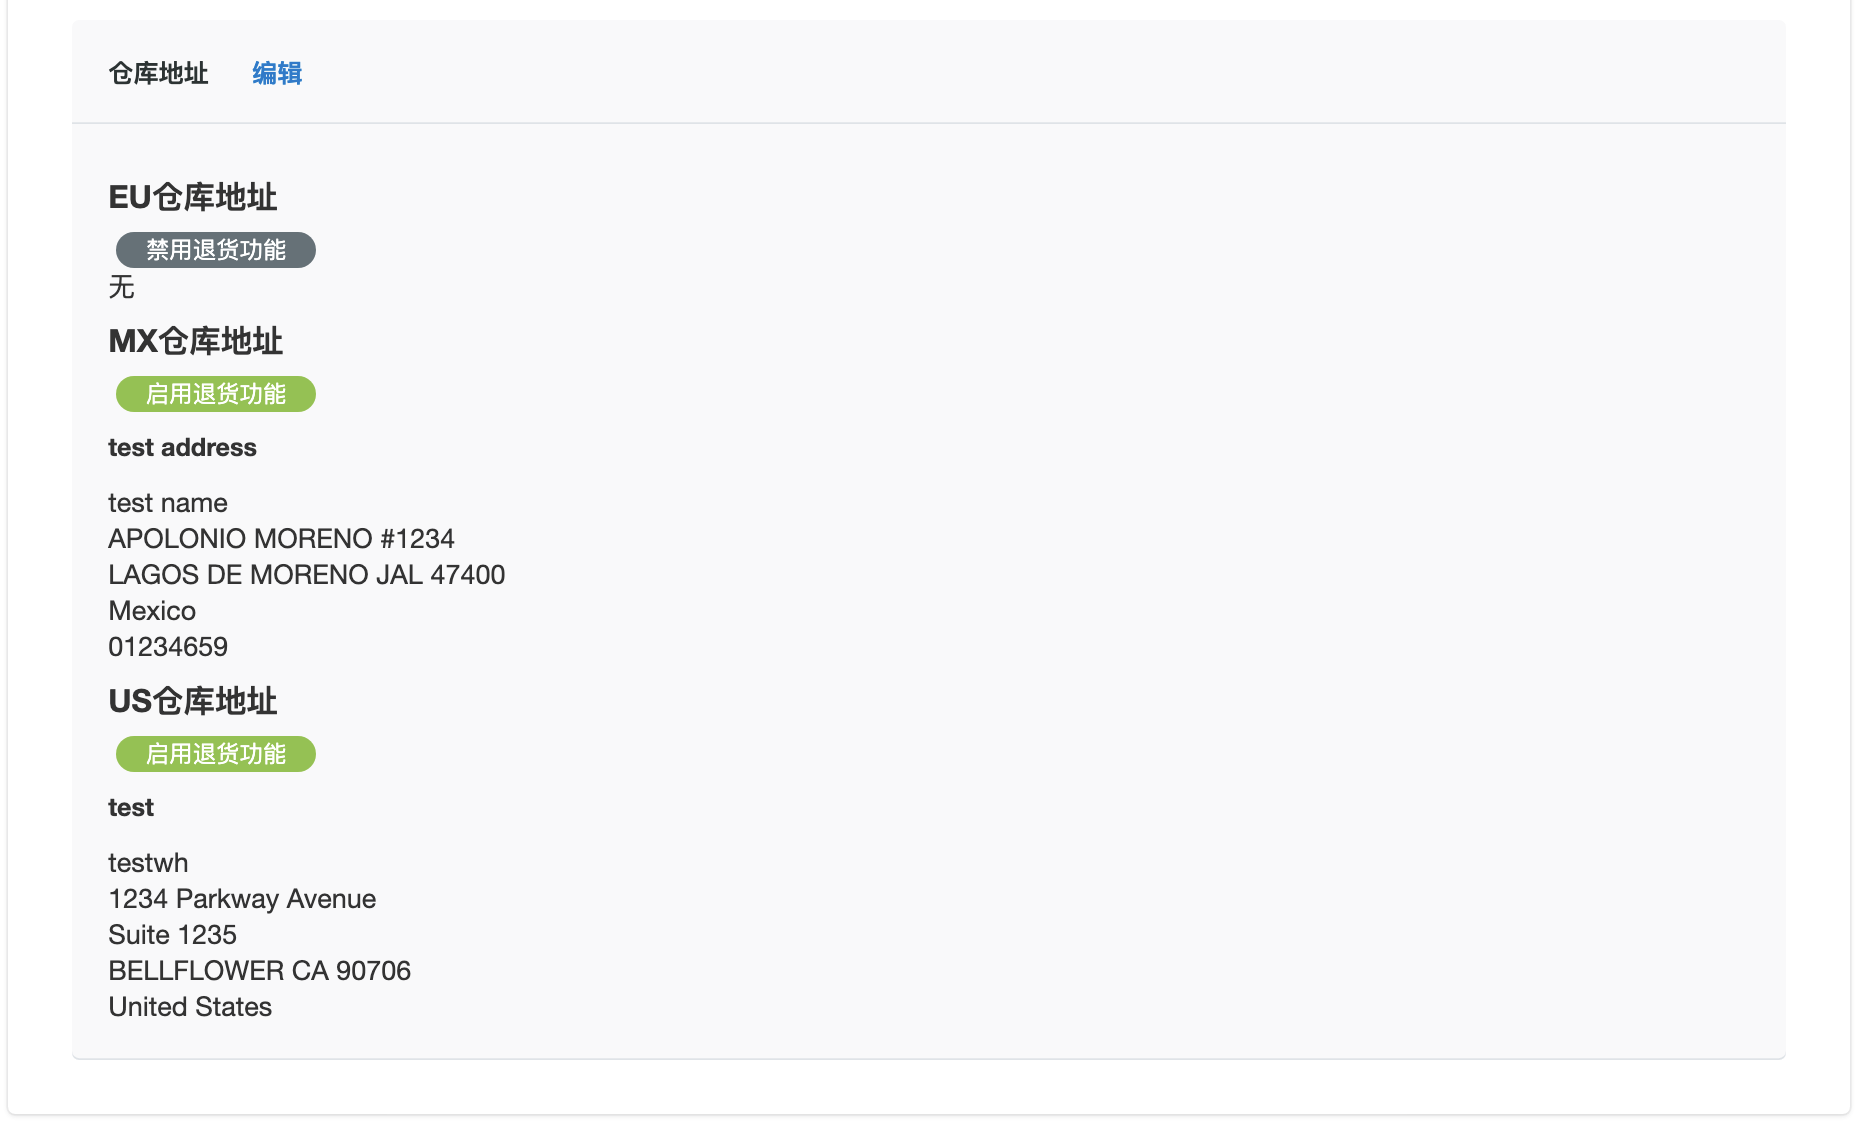
在上方的“查看退货设置”页面,前往“仓库地址”部分,然后点击“编辑”:
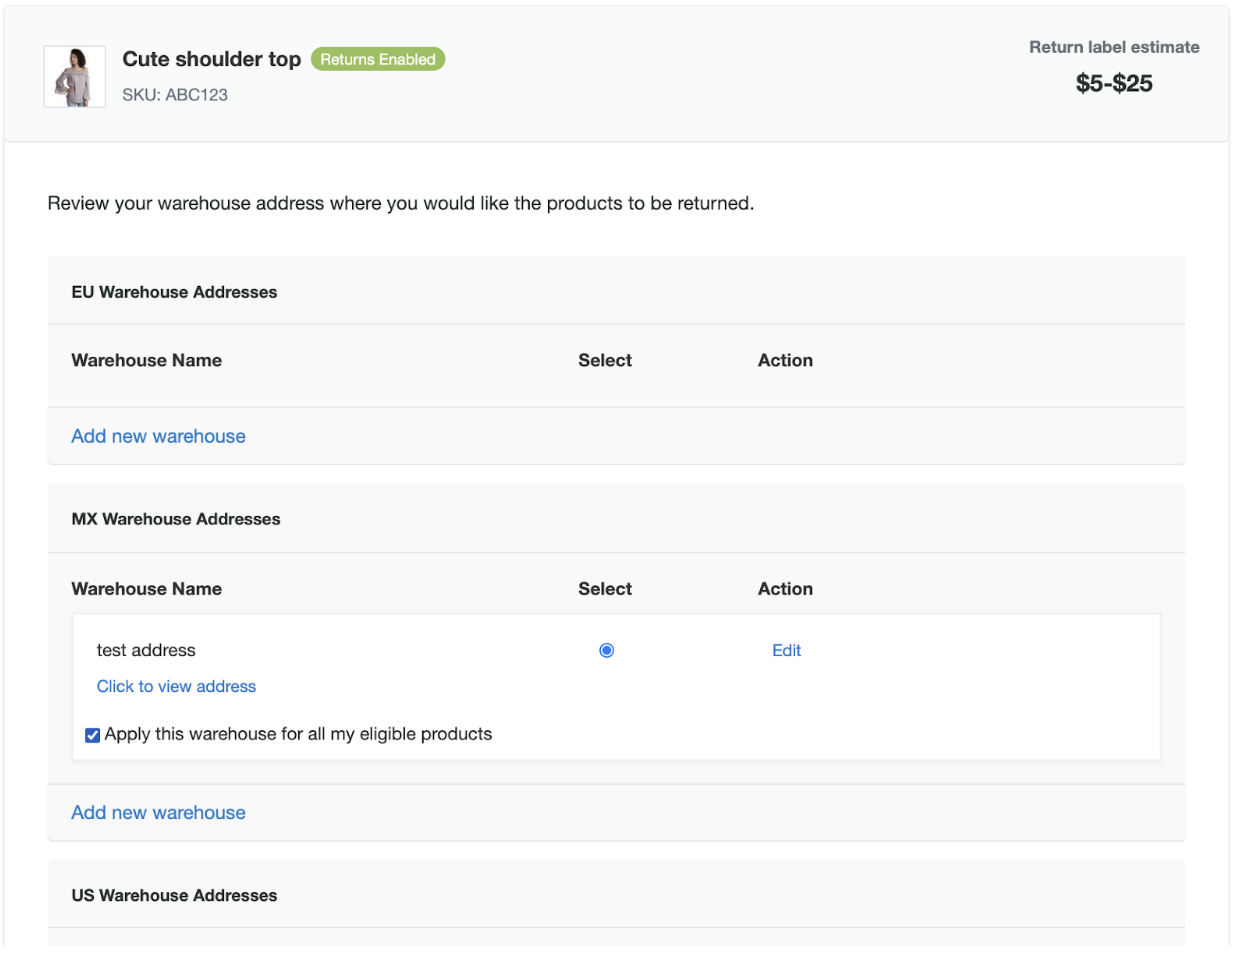
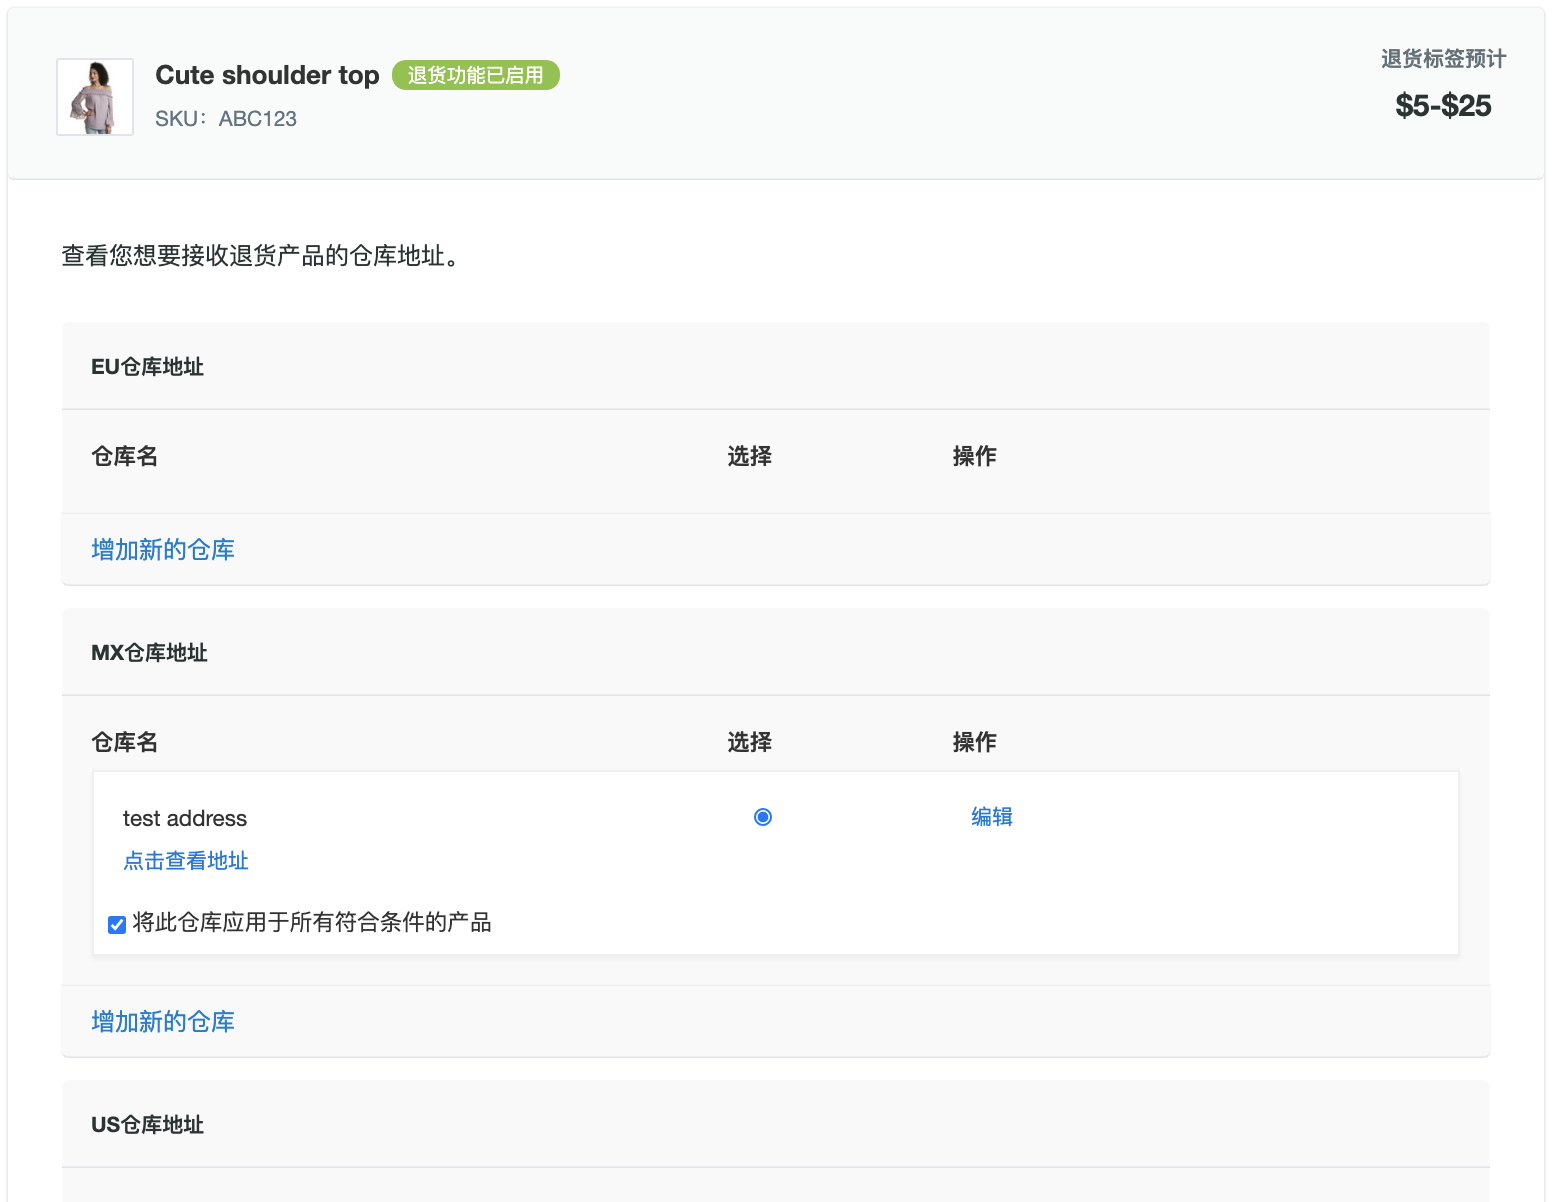
在下一步中,选择要加入具有物流信息的合资格产品的退货仓库地址,包括已加入退货项目的任何产品。只需点击“将此仓库应用于所有合资格产品”复选框即可:
点击“保存并继续”,在随后的弹窗中确认更新内容,并点击“提交”:

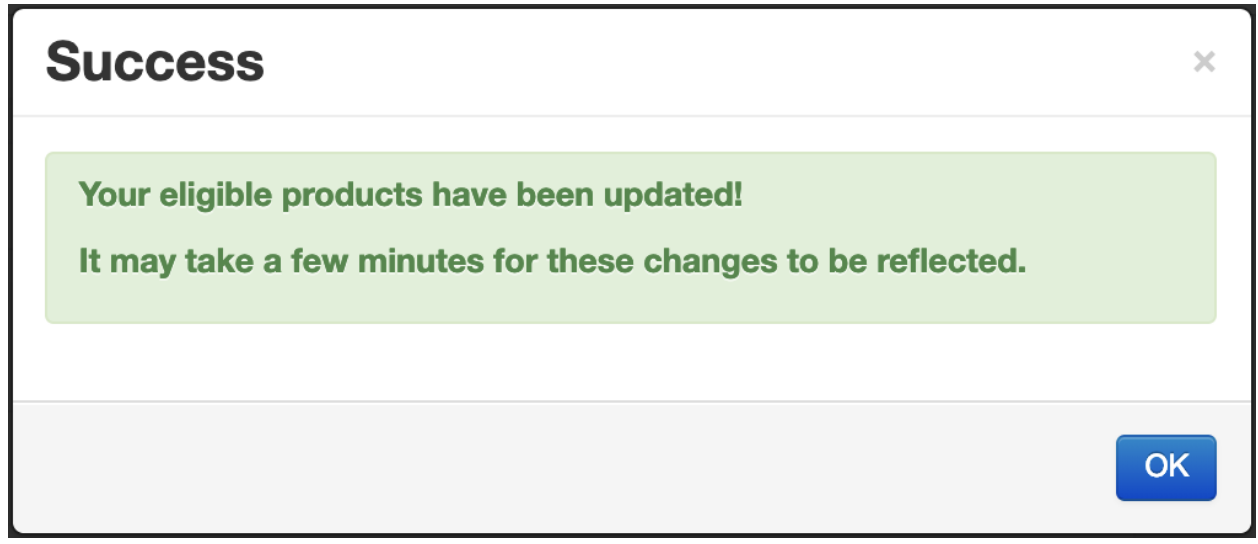
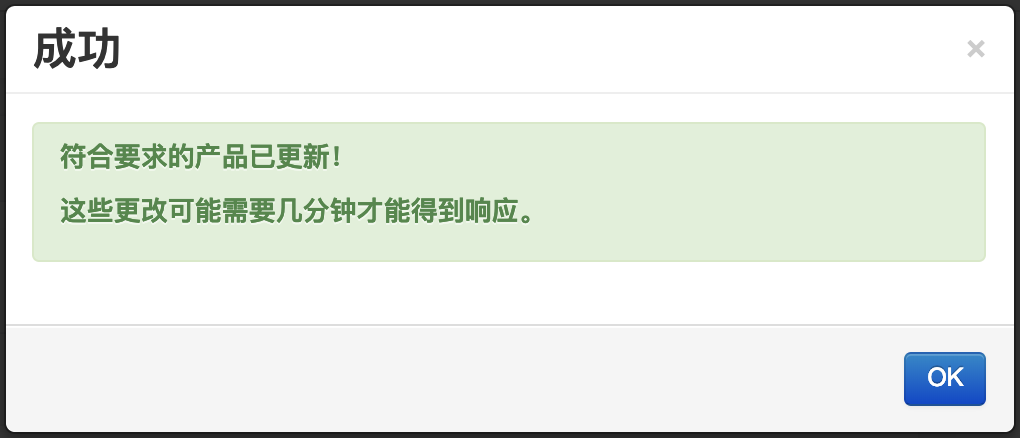
在确认更新后,商户平台会在几分钟后显示您所做的更新。
wish商户官网原文详情:
How do I enable returns for my products?
Merchants are able to enable Returns either manually on Merchant Dashboard or via API.
**Enable Returns on Merchant Dashboard**
On the Merchant Dashboard, navigate to the Products > View All Products page.
Merchants have the option to either enroll products for Returns individually, or in bulk. Note that if merchants use the bulk-enroll option, this will update the Returns settings for all of their eligible products with logistics information, including any that are already enrolled for Returns. If merchants use the bulk-enroll option for the U.S. returns, only the U.S. returns settings for their products will be updated; similar logic applies to MX and EU returns. See below “Enabling Returns for products in bulk” on how to use the bulk-enroll option.
Enabling Returns for products individually
1. On the Merchant Dashboard, navigate to Products > View All Products. For the product that you would like to enroll in the Returns Program, click “Enroll” under the “Returns Enrolled column:
2. Then you’ll be directed to the Wish Returns Program Terms of Service page. Click “Agree” to continue:
3. If you have not yet added logistics information for the product, you will be prompted to do so next. You can enter logistics information either manually for the selected product, by uploading CSV for multiple products, or by using API to upload for multiple products. You can learn more about how to add logistics information for your products in this FAQ here.
Note that products that exceed a specific logistics requirement are not returnable through Wish. You will still be able to save the logistics information, but you will receive a warning message in Step 4 below, and you won’t be able to proceed with enrolling the product into the Returns Program. Please see “What information do I need to provide in order to enroll my products in this program?” section above for detailed logistics requirements.Once all information is filled out, please click the “Save and Next” button.
4. Next, you’ll be prompted to enter the return warehouse address. Select a region of your return warehouse, and fill out the rest of the information:
If the logistics information you entered in Step 3 above exceeds the requirements for each supported country/regions, you’ll receive a warning message after filling out the address for your return warehouse on this page (see the example screenshot below for EU returns):
5. After you correctly enter your return warehouse address, you’ll be able to review the return warehouse address and select one for your EU, MX, or U.S. returns. You also have the option to add new return warehouse on this page as you’re able to enroll one product for multiple return warehouses:
Note that Wish also provides merchants with a return label estimate on this page, so you are aware of the approximate fees that will be deducted from your account balance per customer return. Click “Save and Next” to proceed.
6. Your product now has returns enabled! The next page will show you a summary of the product logistics information, a return label estimate, and the corresponding return warehouse address for your review:
You’re also able to access the above summary page for your product by navigating to Products > View All Products and select “View” under the “Returns Enrolled” column for the product you’ve already enrolled into the Wish Returns Program:
Alternatively, you can also navigate to the “Actions” column on the right-hand side, click on “Actions” dropdown and select “View returns setting” to view the same information above:
Enabling Returns for products in bulk
From your “View return setting” view above, navigate to the “Warehouse Address” section, and click “Edit”:
In the next step, select the return warehouse address you would like to use for enrolling all of your eligible products with logistics information, including any that are already enrolled for the Returns Program. Simply click the “Apply this warehouse for all my eligible products” checkbox:
Click “Save and Next”, and confirm your update in the popup modal that follows by clicking “Submit”:
Once you have confirmed the updates that will be made in bulk to all your eligible products with logistics information, please allow up to a few minutes for the updates to reflect on your Merchant Dashboard.
文章内容来源:wish商户官方网站


