shopify Star Micronics TSP100III LAN 收据打印机(一)
Star Micronics TSP100III LAN 收据打印机
型号:TSP143IIILAN
要求
若要在您的 Shopify 商店中使用此硬件,您需要满足以下要求:
全新 Shopify POS
运行 iOS 12.2 或更高版本的兼容 iPad 或 iPhone 或者运行 5.0 版 (Lollipop) 或更高版本的兼容 Android 设备
哪里可以购买 Star Micronics TSP100III LAN 收据打印机
Shopify 硬件商店美国、加拿大、英国和爱尔兰的商家提供 Star Micronics TSP100III LAN 收据打印纸。
购买打印纸
满足以下条件的任何热敏纸卷均适合此打印机:
宽度为 3 1/8 英寸(80 毫米)
长度不超过 230 英尺(70 米)。
有关如何装入收据打印机的说明,请参阅制造商的硬件手册中的指南。
安装和设置
TSP100III LAN 收据打印机使用以太网电缆连接到您的网络。若要使用此打印机,您必须在您的地点和路由器中设置一个网络,这样您可以使用以太网电缆将打印机连接到此网络。
在开始之前,请确保您具有所需的电缆。
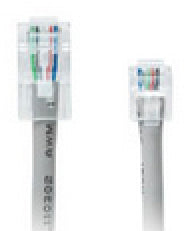
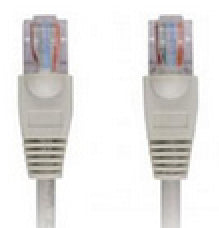
| 电缆类型 | 此连接器的位置 | 获取途径 |
|---|---|---|
| 现金抽屉电缆 |  | Shopify 的零售定制套件中包含了适用于现金抽屉的电缆。如果您单独购买了现金抽屉,则供应商应该能够向您出售电缆。 |
| 以太网电缆(用于连接路由器) |  | 在从 Shopify 购买此打印机时,会包含大约 1 米长的以太网电缆。如果您在其他地方购买打印机,则还需要以太网电缆。 |
步骤:
将收据打印机插入电源。
使用电源开关打开收据打印机。
将一卷热敏打印纸插入打印机。
使用现金抽屉电缆将收据打印机连接到 APG Vasario 320 系列现金抽屉。
将收据打印机连接到路由器上的以太网端口。这使得打印机可在 Shopify POS 应用中被发现。
连接您的打印机后,请记住执行以下操作:
将其设置为默认打印机(可选)
打印测试收据
测试与现金抽屉的连接(如果适用)。
如果您的 TSP100III LAN 打印机停止工作
您的打印机可能会由于多种原因而无法运行。
步骤:
检查您的网络电缆是否已连接到无线路由器。
检查您是否已连接到 Internet。您的打印机需要 Internet 信号才能正常运行。
检查您的打印机是否显示在 Shopify POS 应用的硬件设置屏幕上。
尝试关闭/打开打印机。此操作将重启打印机,并且通常会修正打印机端的任何问题。
要调试打印机,请关闭打印机,然后按住 FEED(进纸)按钮。在按住 FEED(进纸)按钮的同时,重新打开打印机。让打印机打印固件信息,然后松开 feed(进纸)按钮。打印机将尝试连接到 Internet,然后继续打印更多诊断信息。查看已打印的纸张,看看是否存在与显示的文本相符的以下问题:
- “Current IP Parameters Status”(当前 IP 参数状态)下的 IP 地址显示为零。
首先关闭打印机,等待五秒钟,然后再将其重新打开。重试调试过程。
如果这不起作用,请确认您已连接到路由器的 LAN 端口,并确认路由器已正确插入并正常工作。查看打印机设置视频。
最后,如果上述解决方案均无效,请联系您的 Internet 提供商。这可能是您的 Internet 设置问题。
我看到一条“无主机连接”消息。
当断开 Internet 连接或打印机未正确连接到路由器时,通常会发生此情况。请检查您的 Internet 信号和路由器电缆。
备注:打印机出现问题?联系 Star Micronics 客服以获取帮助。
Shopify商户官网原文详情:
Star Micronics TSP100III LAN receipt printer
Model number: TSP143IIILAN
Requirements
To use this hardware with your Shopify store, you need to meet the following requirements:
the all-new Shopify POS
a compatible iPad or iPhone that is running iOS 12.2 or higher OR a compatible Android device that is running version 5.0 (Lollipop) or higher
Where to buy the Star Micronics TSP100III LAN receipt printer
The Star Micronics TSP100III LAN receipt printer is available from the Shopify Hardware Store in United States, Canada, United Kingdom, and Ireland.
Buying printer paper
Any thermal paper rolls work with this printer if:
the width is 3 1/8" (80mm)
the length does not exceed 230 feet (70m).
For an explanation of how to load the receipt printer, see the guide in the manufacturer's hardware manual.
Installation and setup
The TSP100III LAN receipt printer connects to your network using an Ethernet cable. To use this printer, you must have a network set up in your location and a router that you can connect your printer to using an Ethernet cable.
Before you get started, make sure you have the cables that you need.
Cable type Look for this connector Available from Cash drawer cable A cable for the cash drawer is included in the retail custom kit from Shopify. If you bought your cash drawer separately, your supplier should be able to sell you a cable. Ethernet cable (for connecting to the router) An Ethernet cable approximately 1 m in length is included when you buy this printer from Shopify. If you buy it elsewhere, then you need to buy the Ethernet cable. Steps:
Plug the receipt printer to a power source.
Turn the receipt printer on using the power switch.
Insert a roll of thermal printing paper into the printer.
Connect the receipt printer to the APG Vasario 320 series cash drawer using the cash drawer cable.
Connect the receipt printer to the Ethernet port on your router. This makes the printer discoverable in the Shopify POS app.
After connecting your printer, don't forget to:
Set it as the default printer (optional)
Print a test receipt
Test the connection to the cash drawer (if applicable).
If your TSP100III LAN printer stops working
Your printer might not be working for several reasons.
Steps:
Check to see that your network cable is connected to your wireless router.
Check to see that you are connected to the internet. Your printer requires an internet signal to run properly.
Check to see that your printer appears on the Hardware settings screen on the Shopify POS app.
Try turning your printer off/on. This restarts your printer and usually fixes any issue on the printer's end.
To debug your printer, turn your printer off and press and hold the FEED button. While still holding the FEED button, turn the printer back on. Let the printer print off the firmware information and then let go of the feed button. The printer tries to connect to the internet and then continues to print off more diagnostic information. Take a look at the printed paper to see if any of the following issues match the text displayed:
The first thing to do is turn off the printer, wait five seconds, and turn it back on. Try the debug process again.
If that doesn't work, confirm that you're connected to the LAN port of your router, and that your router is properly plugged in and working. Check out the printer setup video.
Finally, if none of the above solutions worked, contact your internet provider. It could be a problem with your internet setup.
The IP address under "Current IP Parameters Status" displays zeroes.
I see a "No Host Connection" message.
This usually happens when you lose your internet connection or when your printer is not connected to your router properly. Check your internet signal and router cable.
Note
文章内容来源:Shopify商户官方网站